This procedure may need to be performed if the Graphite Wide Angle Driver was purchased separately from your machine, the driver has been dropped or mishandled, or if prompted by Melco Technical Support.

The Graphite Wide Angle Driver may need to be adjusted to custom-fit each AMAYA XT, XTS and BRAVO machine. A driver that is not properly adjusted to the machine it is used on will result in negative impact to sew out quality and machine productivity and reliability.
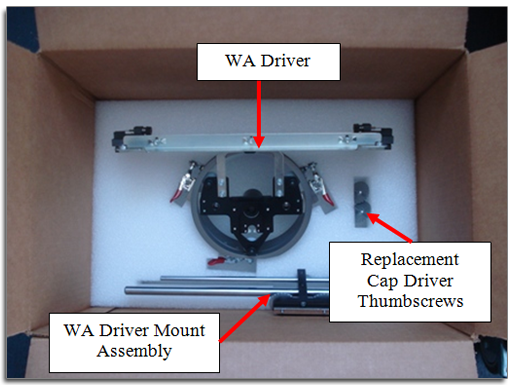
If you ordered a Graphite Wide Angle Driver with your AMAYA machine you will find the following items in the Wide Angle Driver box: The Graphite Wide Angle Driver, the Driver Mount Assembly, and two Replacement Cap Driver Thumbscrews.

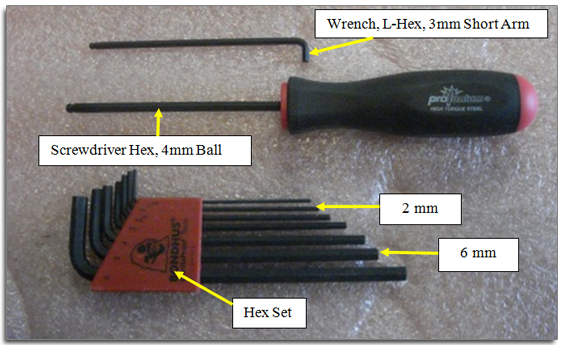
The following tools provided in your AMAYA Operator’s Kit will be used:
• Screwdriver, Hex Drive, Ball End, 4mm
• Wrench, L-Hex, 3mm, Short Arm
• Hex Set, 7 Pieces, Metric Long – 6mm and 2mm
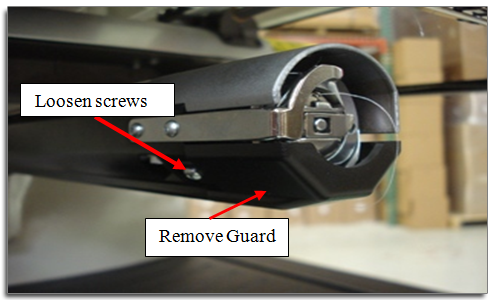
1. Using the 2mm Allen Hex Wrench, loosen the two Button Head Screws that hold the Hook Guard to the Lower Arm Extrusion. The screws do not need to be removed. They only need to be loosened. There is one screw on the left side and one on the right side of the Lower Arm. Remove the Hook Guard.
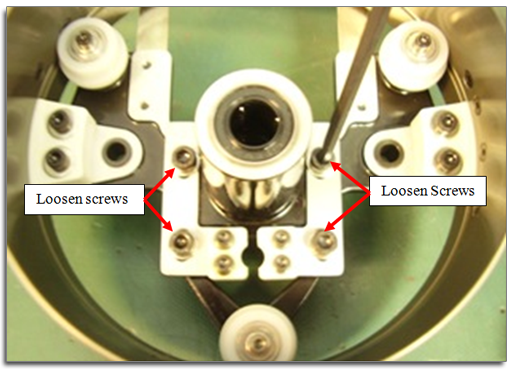
2. Loosen, BUT DO NOT REMOVE, the 4 Hex Head Screws on the Wide Angle Driver Support Bracket using the 4mm Hex Drive Screwdriver.
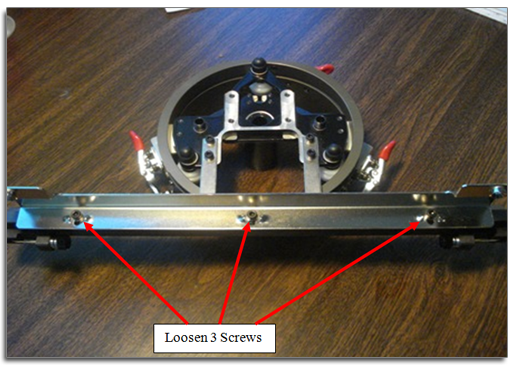
3. Loosen, BUT DO NOT REMOVE, the 3 Hex Head Screws on the Wide Angle Driver Interface Bracket using the 3mm Short Arm L-Hex Wrench.
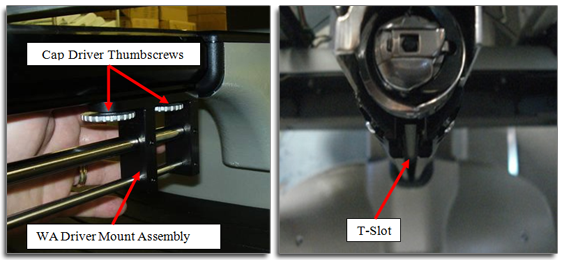
4. Loosen, BUT DO NOT REMOVE, the two Cap Driver Thumbscrews on the Wide Angle Driver Mount Assembly. Insert the Assembly into the T-Slot on the underside of the Lower Arm Extrusion. Slide and push the Assembly back until it hits a hard stop. Tighten the two Cap Driver Thumbscrews.
5. Re-install the Hook Guard that was removed in the first step.
6. Slide the Wide Angle Driver Ring Assembly onto the Driver Mount Guide Shafts.
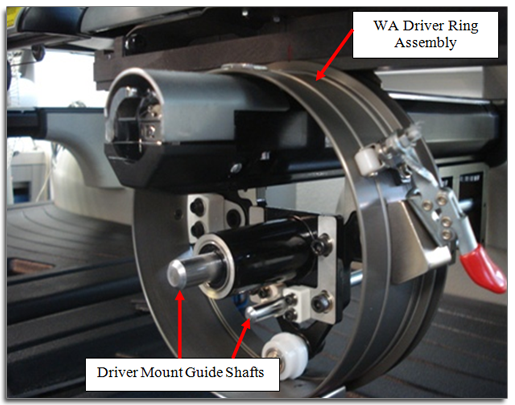
7. Slide the Wide Angle Driver Ring Assembly towards the back of the machine until the mounting holes in the Wide Angle Driver Interface Bracket line up with the mounting holes in the X-Carriage.
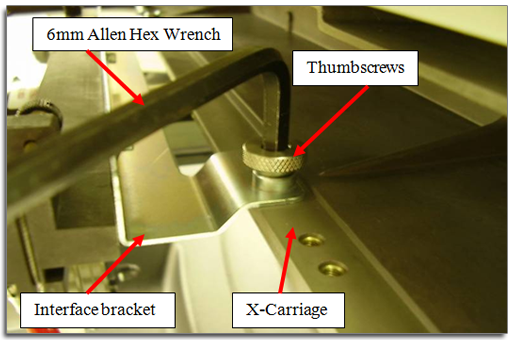
8. Manually move the X-Carriage with the attached Wide Angle Driver towards you and position it approximately halfway over the back edge of the Needle Plate.
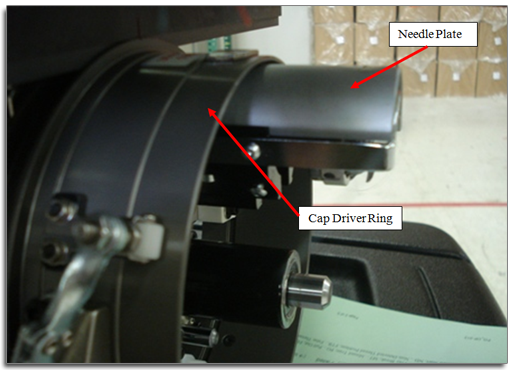
9. Place a regular business card between the Needle Plate and the Wide Angle Driver Ring as shown in picture 10 below.
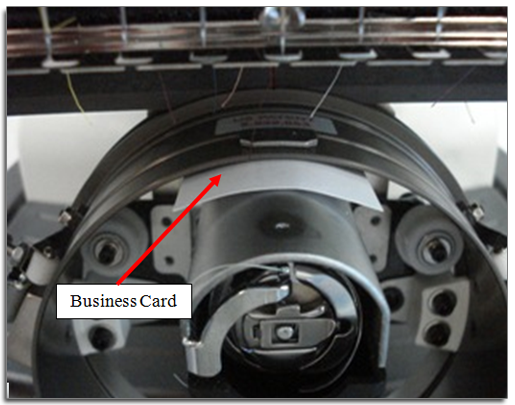
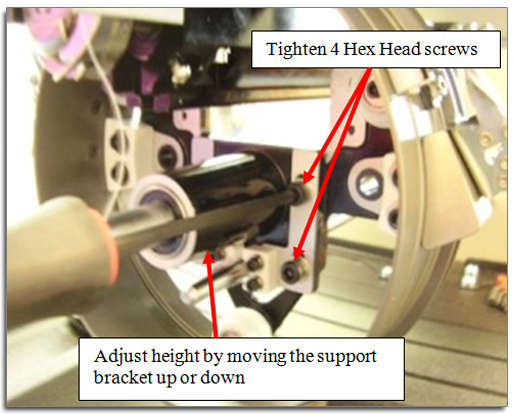
10. Adjust the height of the Graphite Wide Angle Driver by moving the Wide Angle Driver Support Bracket up or down until the Wide Angle Driver Ring rests on the business card. Hand-tighten the 4 Hex Head Screws on the Wide Angle Driver Support Bracket with the 4mm Hex Drive Screwdriver. The proper height position for the Wide Angle Driver is achieved when you can slide the business card back and forward with some but minimal resistance.
11. Once the height is set correctly, fully tighten the 4 Hex Head screws.
12. The next step is the height adjustment of the Graphite Wide Angle Driver Mounting Bracket, Make sure that the Graphite Wide Angle Driver Mounting Bracket is centered left to right over the Lower Arm. Apply downward pressure to the Wide Angle Driver Mounting Bracket and while doing so hand-tighten the center Hex Screw using the 3mm Short Arm L-Hex wrench.
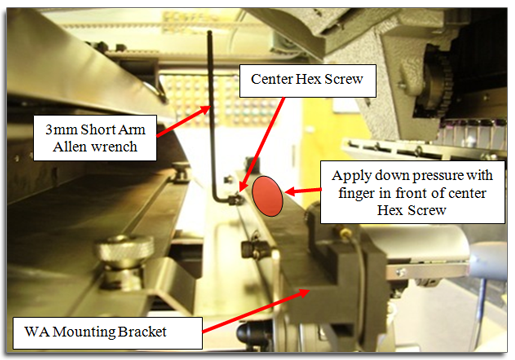
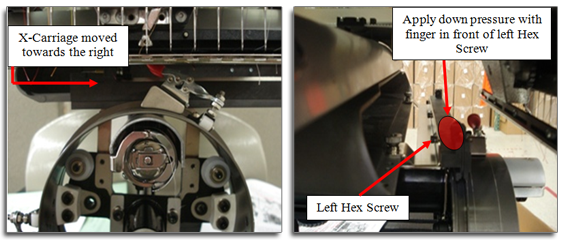
13. Once the center Hex Screw is hand tight move the X-Carriage to the right. Now hand-tighten the left Hex Screw shown in picture 14 below in the same fashion the center Hex Screw was tightened for the center screw.
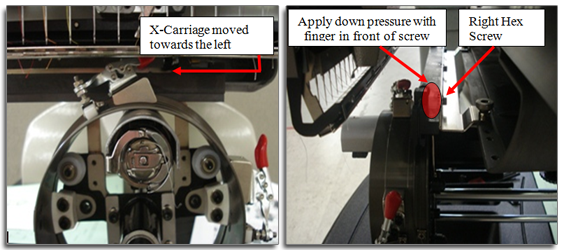
14. Once the left Hex Screw is hand tight move the X-Carriage to the left as shown in picture 15 below. Now hand-tighten the right Hex Screw in the same fashion the center and left Hex Screws were tightened in steps above.
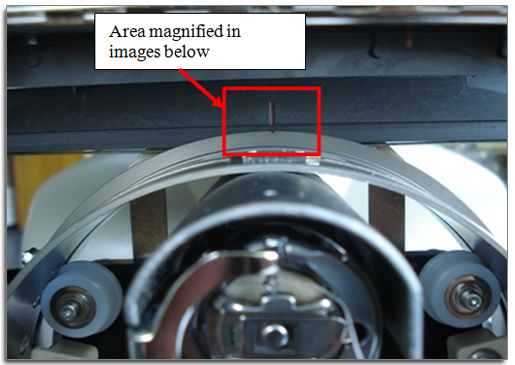
15. After all 3 Wide Angle Interface Bracket Hex Screws are hand tight, move the X-Carriage to its center position. Ensure that at this position that the Wide Angle Driver Ring is in contact with the Wide Angle Driver Mounting Bracket
Now move the X-Carriage to the right and perform the same visual check. Move the X-Carriage to the left and perform the same visual check.
If at any time during its left to right travel, the Wide Angle Driver Ring does not contact the Wide Angle Mounting Bracket, repeat the above steps.
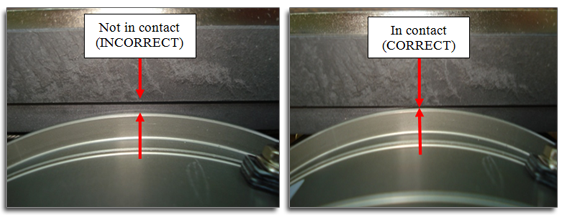
16. Once the Graphite Wide Angle Driver Mounting Bracket height is verified fully tighten all three Hex Screws (center, left, and right).
ADVICE: If you have more than one AMAYA machine with a Graphite Wide Angle Driver, and since the Graphite Wide Angle Drivers must be adjusted to custom fit each AMAYA machine, the machine serial number a specific Graphite Wide Angle Driver was adjusted to should be noted on the Graphite Wide Angle Driver (permanent marker or an adhesive label). That way it is clear which Graphite Wide Angle Driver belongs and is adjusted to which machine.