Flex + Mode allows you to utilize machines more efficiently. When one machine completes its design and becomes available, a new design can be loaded onto it and started sewing. This feature eliminates the need to reconfigure machines repeatedly as you do not have to configure your machine prior to use.
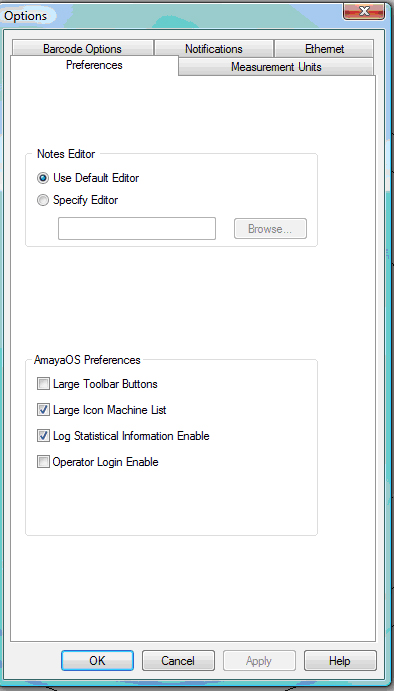
When you are in Flex + Mode you can choose Large Toolbar Buttons and Large Icon Machine List to have a simplified AMAYA interface.
To load a design in AMAYA Advanced Operating Mode:
Click on Load Design. A dialog opens that allows you to select which machines will receive the design.
You can change or modify the machines selected for the design by selecting within the machine list or selecting an available group from the machine group combination box.
After the machine(s) is selected, choose the design file that you want loaded. Go to File->Load Design and select your design. Click OK.
When the File Open dialog has closed, AMAYA OS sends the design to the machine(s) you selected. The design is displayed in the graphic view of the current machine. The other machines that were selected will also be chosen to receive commands.
Machine Selection Control:
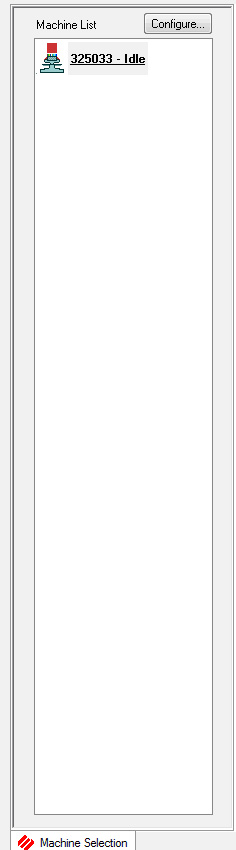
The machine selection control lists all of the machines currently attached to the AMAYA OS system.
The group combo box contains all of the machine groups that are defined in the system. If all the machines in a group are available to have a design loaded, the entry is active. If any machine in the group is busy, the group is not available for design load and is grayed out.
Setting Machine Operating Parameters:
Before starting any of the machines that you sent your design to, you can set the operational parameters for each. All of the machines selected in the main view will receive the same command.
If you want one machine to be set up differently than the rest, you must select it individually and change its settings. If any of the machines have started sewing, you must clear the selection of multiple machines and go back and select the one machine individually. If multiple machines are selected and any one machine is started, the selection list will change automatically.
Naming the AMAYA Machine while in Advanced Mode:
In Advanced Mode, you can name the different AMAYA machines for easier identification. If you have not named a machine, the machine's serial number will be displayed in all dialogs between the machine and the AOS software.
To name a machine and set the display order in the list view, perform the following steps:
1. Click on Tools->Set Machine Name And S/N, or click on the Configure button to the right of the “Machine List” text at the top of the machine list view. This opens the Machine Identification Configuration dialog.
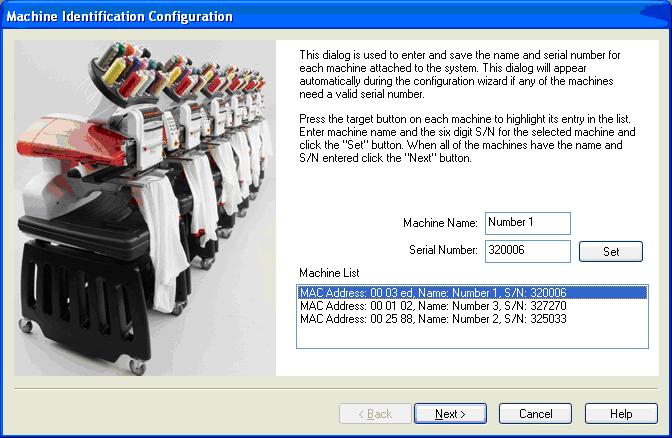
2. Select each machine in the Machine List. Enter the machine name and serial number for each machine. Click on the Set button to save the name and serial number into the machine memory before moving to the next machine.
3. When all of the machines have the name and serial number set, click on the Next button to move to the Machine Display Order Configuration dialog.
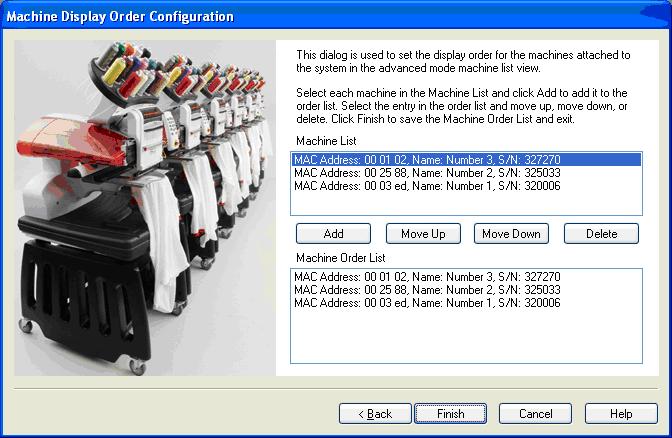
4. The machines that are currently attached to AOS will be listed in the Machine List.
5. The machines listed in the Machine Order List have already been added and placed in the list.
6. To add a machine to the order list, select it in the Machine List box and click on the Add button. The machine will be added at the bottom of the Machine Order List box.
7. To change the order of the machines in the list, click on the desired machine to set the selection in the Machine Order List box. Click on the Move Up and Move Down buttons to move the selected machine to the correct position in the list.
8. To delete a machine from the order list, click on the desired machine to put the selection in the Machine Order List box, then click on the Delete button to delete the machine entry from the Machine Order List box.
9. When all of the machines have been added and correctly positioned in the list, click on the Finish button.
10. The Machine Display Order Configuration dialog will close and the machines will re-attach to AOS. The machines are displayed in the machine list view with the names that were assigned to each machine and in the order that was specified.