Machine List Configure
Note: Machine List View is only available in AOS Flex+
When you click on the  button from the Machine List view the following screen will appear (Fig 1.1). This screen will allow you to rename and change the order of the machines you currently have connected to AOS. The on screen instructions will walk you through the process. These same steps are listed below.
To change the name or the order of machines listed in the Machine List View:
- Click
 from the Machine List View window and you will be taken to the Machine Identification Configuration (fig 1.1).
- From the Machine Identification Configuration window click on the first machine you wish to modify.
- After clicking on the machine you wish to modify you can:
- Rename the machine by typing in the field next to "Machine Name" - click on
 to make your changes permanent
- Change the serial number by typing in the field next to "Serial Number" - click on
 to make your changes permanent
- Click
 to continue. You will see the screen shown in Fig 1.2 called Machine Display Order Configuration.
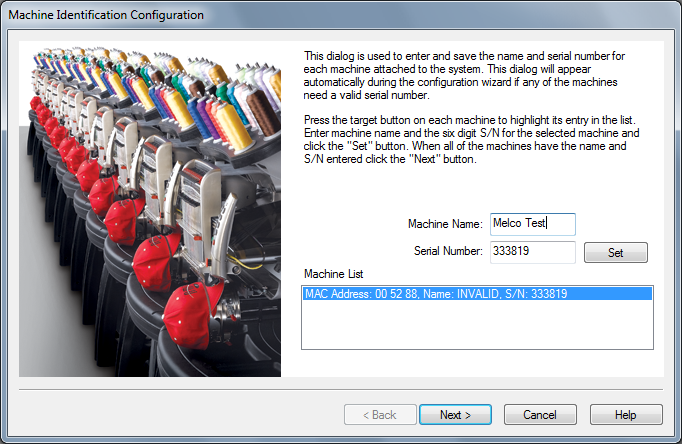
(Fig. 1.1)
- From the Machine Display Order Configuration window you can:
- Change the order of machines by clicking on the machine you wish to add to your list and then click add

- When a machine is selected in the Machine Display Order Configuration window you can click on
 or
or  to move the machine up or down in the list order.
- When a machine is selected, clicking on
 will remove the machine from the list.
- Clicking on the
 button will return you to the Machine Identification Configuration window.
- Clicking on the
 button will save all of your changes and return you to the main AOS screen.
- Clicking on
 will cancel any changes you have made and return you to the main AOS screen.

(Fig 1.2)