
When changing a cone of thread, you do not need to re-thread the path. The easiest way to change a thread cone is to remove the cone you do not want, but leave a long end on the old thread. Place the new cone of thread on the tree and tie the new thread to the old thread with a square knot. From the needle end, carefully pull the new thread through the thread path.
The following image displays the different parts of the needle case. Use this image as a guide when threading your machine.
To start a new cone of thread, push the PLASTIC thread tubes up from behind the thread tree so that the cone of thread will sit on the tube. Place the spool of thread on the thread seat. The thread tube should extend ½ to 1 inch above the cone of thread.
|
|
Important: Neglecting to extend the thread tube ½ to 1 inch could result in frequent thread breaks. |
Locate the monofilament provided in the operator’s kit. This is used to feed the thread through the tube. A can of compressed air may also be used.
To use the monofilament, locate the small hole behind the thread feeder assembly. Push the monofilament into this hole and up through the supply tube.
Then hook the thread on the notched part to the monofilament and pull the thread slowly through the tube.
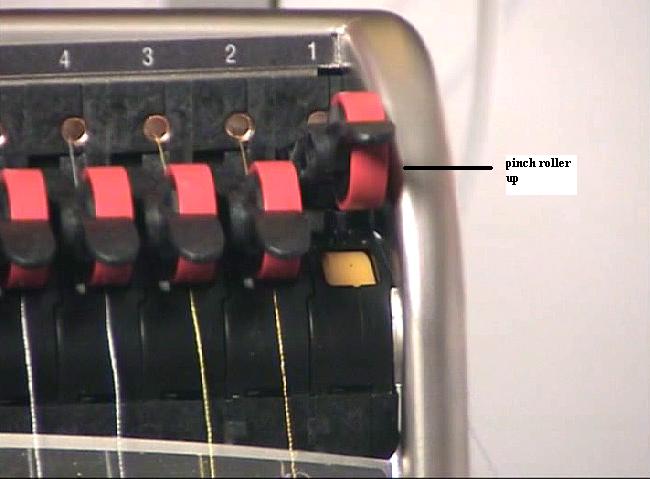
Push the black tab on the red pinch roller up.
Now, pull the thread from the hole and place it under the pinch roller.
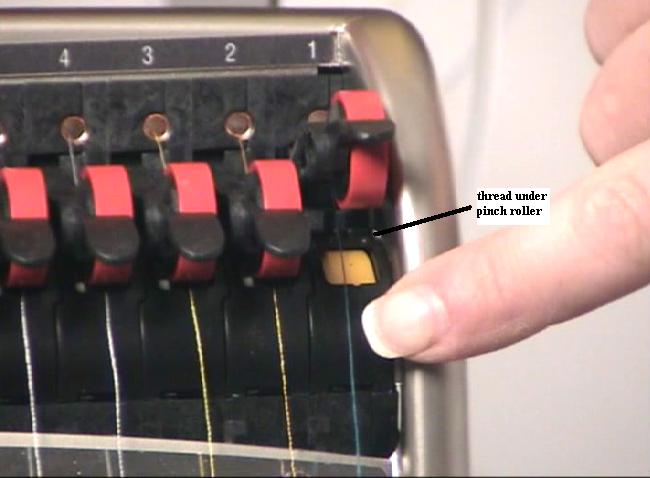
Press the black tab on the red pinch roller down.
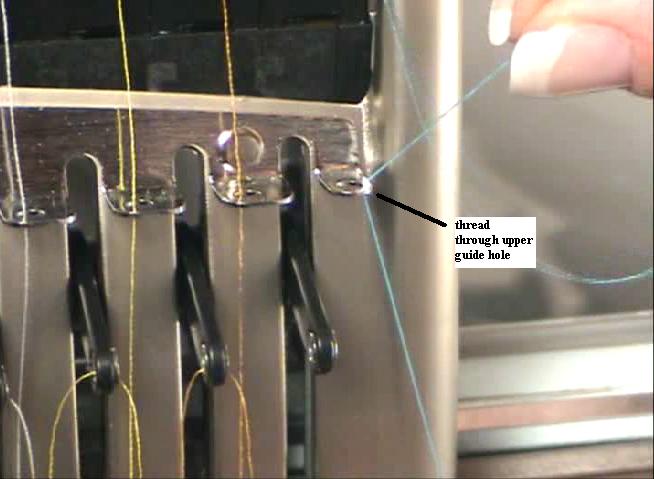
Run the thread through the upper thread guide hole, facing downward.
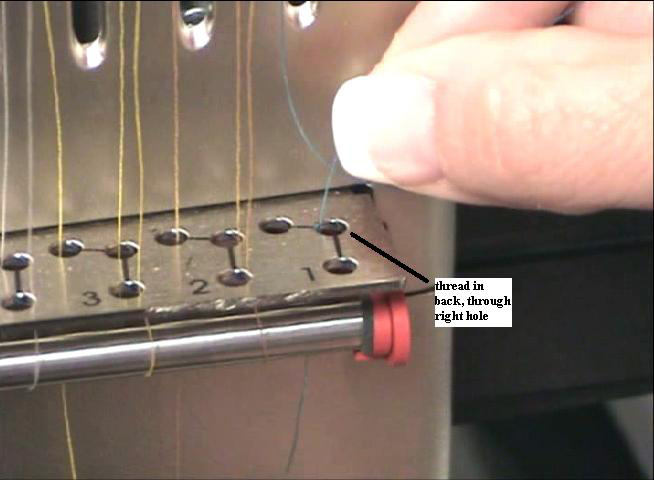
Pull the thread down to the middle metal thread guides back, right hole. Push the thread in the hole facing downward. Make sure the thread is to the right of the take-up lever.
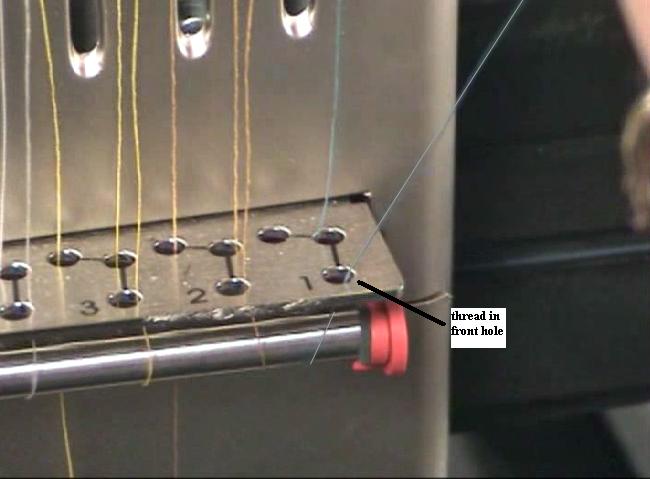
Bring the thread around the thread sensor and up through the front hole of the middle thread guide.
Pull the thread up and bring it through the take-up lever eye, from right to left.
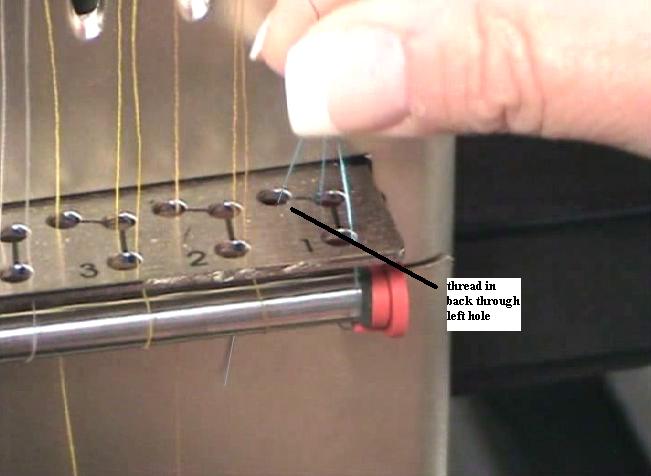
Route the thread straight down to the middle thread guides back, left hole, facing downward.
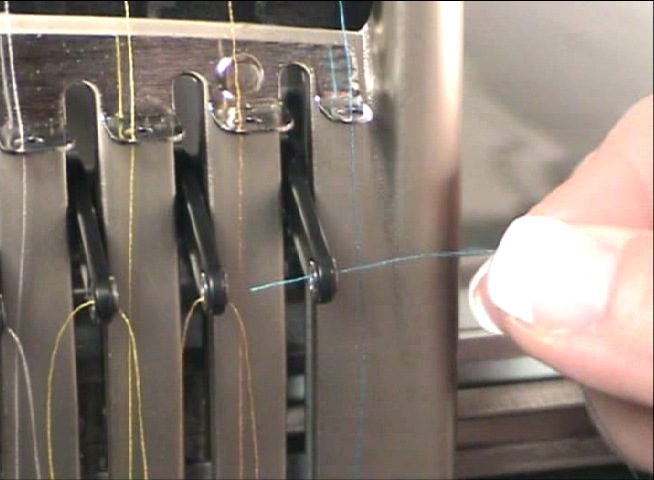
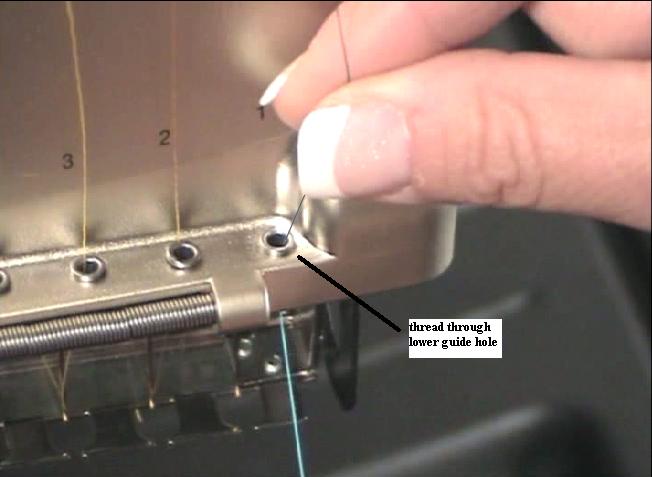
Feed the thread through the lower guide hole located behind the thread retainer spring.
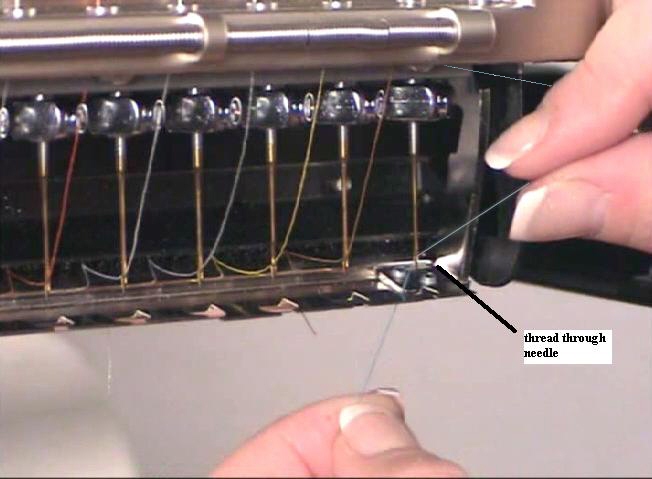
Run the thread through the eye of the needle, from front to back. You may need to cut the end of the thread first.
If the needle guard is in the forward position, press the Adjust ![]() and Center
and Center ![]() buttons on the keypad to ensure the back position.
buttons on the keypad to ensure the back position.
Pass the thread through the hole in the safety grabber.

Pull the thread through the front opening and fasten the thread to the thread retainer spring. After threading a needle, do not pull the thread too tightly into the thread retainer spring located at the bottom of the needlecase cover. Too much tension in the thread can affect the thread break detection system.
Trim the end to about an inch in length.