![]()
|
|
This repair requires timing and other adjustments and should be performed by a Melco authorized service technician. |

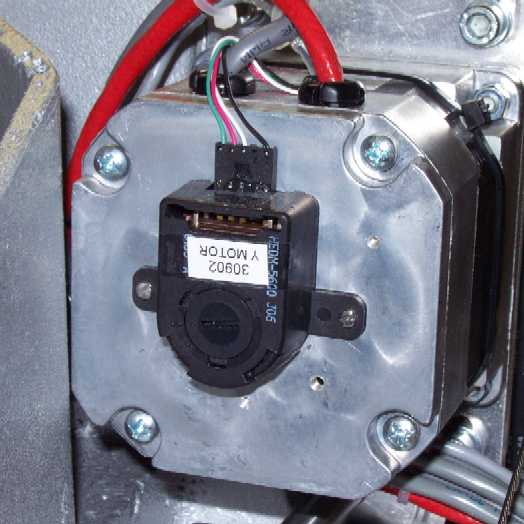
Figure 1 - Y-Motor Installed
Besides in case of a y-motor failure, the y-motor assembly should be replaced when the resistance between each of the phases is inconsistent or substantially different than 2.28±10%Ω. In addition, the resistance between each of the phase wires should be relatively consistent with the other wires.
Replacement Parts Needed:
y-motor assembly
6-inch plastic cable ties (available from any hardware store in the electrical supply section)
Replacement Procedures:
|
|
WARNING!! Risk of serious personal injury exists when handling internal motors, belts, and cabling due to electrical shock and moving parts hazards. Always turn off the AMAYA embroidery machine when working on or adjusting motors, belts or gears. |
1. Turn the machine off and disconnect the A/C wallpower input cord from the A/C wallpower supply outlet.
|
|
CAUTION!! Use extreme care not to drop metallic objects, tools, or other conductive material on the Main PCB when you have the base cover removed. If you drop such objects on the Main PCB, it can severely damaged the electronics which will be very expensive to repair. |
2. Remove the base cover, the left transparent arm cover and the back screw from the right transparent arm cover, the upper arm back cover, and lower arm rear cover.

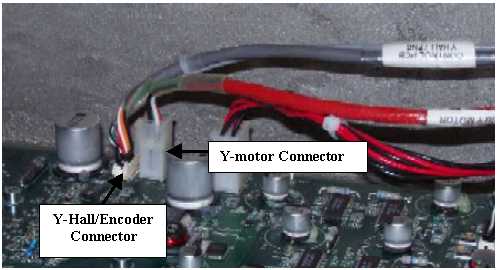
Figure 2 - Y-Motor Connections at PCB
3. Disconnect the Y-motor harness and y-hall/encoder harness from the Main PCB as shown in Figure 2 above.
4. Carefully cut any cable ties that tie Y-motor and encoder harnesses running underneath the y-motor through the lower arm access hole to the main PCB.
5. Pull the y-motor and encoder harnesses through the access port to the back of the machine and let it hang free.
6. Loosen the four M6x20mm cap head socket screws to loosen the tension on the y-motor pulley, then remove the screws, M6 split lock washers, and M6 flat washers.
7. Pull the y-motor timing belt off of the y-motor timing pulley and let it hang on the drive pulley on the y-drive shaft.
8. Remove the y-motor from the machine. (Do not disassemble the y-motor assembly any further, especially if it is to be returned to the factory.)
9. Install the new y-motor in position and place the y-motor belt over the motor pulley.
10. Start the four M6x20mm cap head socket screws, M6 split lock washers, and M6 flat washers loose.
11. Pull up on the y-motor with about 30 lbs pull and tighten the M6x20mm cap head socket screws to Melco Torque Specifications.
12. Measure and reset the y-belt tension if needed. (Click on the link to get the procedures.)
13. Reinstall the covers you removed in step 3.
14. Turn the machine on and run a functional test on the machine, paying particular attention to y-axis movements. Run this test until you are satisfied with the performance of the y-axis movements or you discovered other problems in the test.
15. If the function tests are satisfactory, run the following sew tests on the machine: