 Applique Video
(Available in Pro and Pro+ product levels)
This feature allows you to create and edit all the applique parts in one operation. An applique consists of four parts: the cut line (outline), a color change, the tackdown stitch objects, and the cover stitch objects. Applique is the process of applying a piece of fabric on top of another piece of fabric and attaching the two with stitches (most often with a satin stitch). This process reduces the number of stitches needed in the design and adds depth and texture. Only the cut line is required to create an applique; the other elements are optional.
Tackle twill is a type of applique where the edges are finished with a zigzag stitch. Typically, tackle twill is done with letters or numbers and used for school teams or organizations.
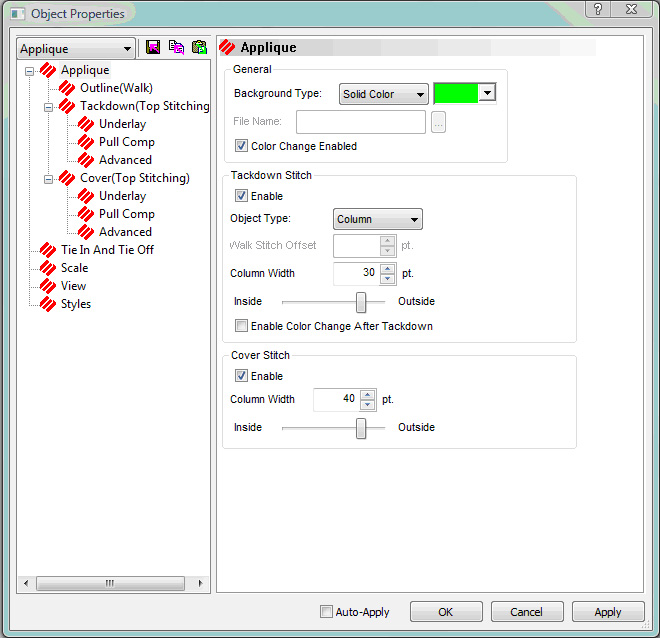
General: In this field, you choose the background for your applique. The choices are: None, Cross Hatch, Solid Color, and Graphic. For Solid Color and Cross Hatch you can click on the Color button to choose the exact color you would like. For Graphic, you would either type in your file path or click the Browse button to find the file on your computer. Check the Color Change Enable box to place a color change between the outline and tackdown elements.
To choose the Outline Properties, click on Walk under Outline on the left of the dialog. You see this screen:
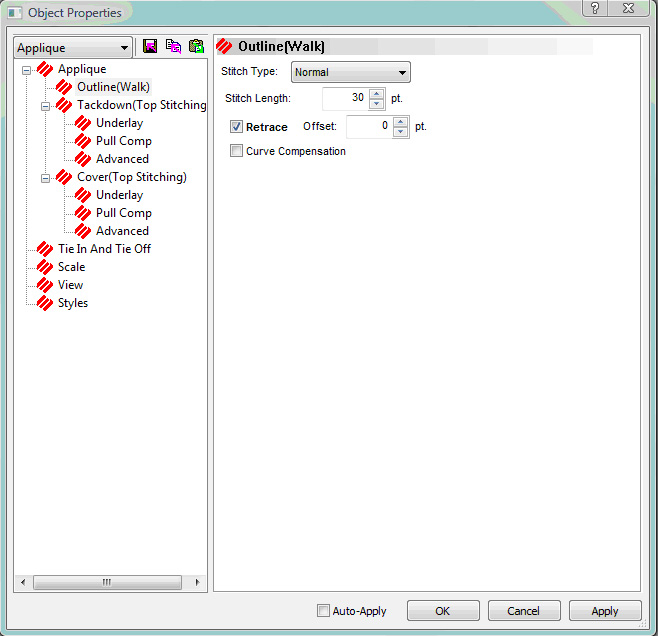
You choose Normal or Bean from the Stitch Type drop down menu. Retrace is useful in making a single walk stitch in your outline appear thicker. To turn this function on, left-click in the box next to Retrace. A check mark will appear to symbolize that this function is on. Click again to remove the check mark, which symbolizes that this function is off. Offset (determined by points) allows the retrace stitches to be offset from the walk stitches. This prevents the retrace stitches from being placed in the same holes as the walk stitches. When used, the offset distance should be set at 2 or 3 points. You can enter negative values to have the retrace stitched to the left of the walk stitch. Stitch Length determines the length of your stitches. As the stitch length value increases, the number of stitches decreases. Typical stitch length values for underlay stitches are between 30 and 40 points. Typical stitch length values for outline and detail stitches are between 15 and 25 points. When Curve Compensation is turned on, DesignShop will automatically decrease the stitch length of walk stitches on tight curves.
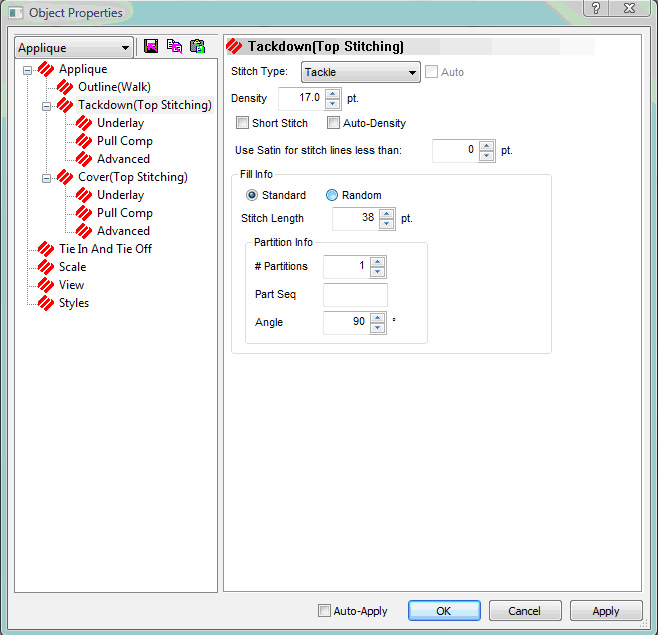
Tackdown Stitch: In this field, you specify the settings for your tackdown stitches. First, click Enable if you want your applique to have a tackdown stitch. For Object Type, you choose Walk Object or Column Object. If you choose Walk Object, the Properties button brings up the same properties dialog as above. If you choose Column Object, you get the Column Properties page. You also set the Offset for your tackdown stitch and specify Column Width if you chose Column Object for your object type. You use the slider bar to set how much of your column is on the inside and how much is on the outside.
Enable Color Change After Tackdown: If this is checked, there will be a color change between the tackdown and the cover stitch..
Cover Stitch: In this field you specify the settings for your cover stitch. First, click Enable if you want your applique to have a cover stitch. You define the width in points for your cover stitch with Column Width. The Properties button brings you to the Column Tab. You use the slider bar to set how much of your column is on the inside and how much is on the outside.
You can access the Applique feature in the following three ways:
The input tool bar 
Insert->Applique
The Main View pop up menu
To create an applique object:
Start Applique using any of the above methods.
Define the primary outline by digitizing your design with straight and curved points.
Press the ENTER key to go to the secondary outlines (holes). Digitize the secondary outline(s).
After the last outline is finished, press the ENTER key to tell DesignShop that the object is finished.
To create a ZigZag applique:
Follow the steps above for creating an applique.
Select (No Underlay) for Primary Underlay.
The density defaults to 30pt.
Click Apply.

Using Applique is very similar to using Complex Fills. Applique does not, however, have the entry and exit point or stitch direction.
Choosing properties for your applique (this can be done before or after you create your applique object):
Choose the settings for the general applique parts:
Click Color Change Enable on if applicable.
Click Enable for the tack down stitches if necessary.
Click Enable for the cover stitches if you want them turned on.
Set the applique material bitmap or color into applique region.
Choose the settings for the individual applique parts:
Set the stitch length for the cut line.
If you enabled tack down stitches, set the stitch type, stitch length or column density, column width, and column offset.
If you enabled the cover stitch, set the stitch type, column density, column width, and column offset.
To edit an applique project:
Select the object.
Move points in the design by clicking and dragging them with your mouse.
The object is updated automatically to reflect the point changes. The Applique feature speeds up the editing process as the digitizer does not have to edit each part individually.
You can change most individual elements in a design to an applique. Simply select the element of the design that you want as an applique. Right click on the element. Select Change Element Type and choose Applique. That element now has applique properties.