Manual Stitches are
linear input methods that you create by entering the points in sequence
from beginning to end.
In this type of stitch, where you place the points is where your needle penetrations will be, without extra needle penetrations in between. The manual stitch is useful when you want to force longer stitch lengths.
You can access the manual stitch by clicking the toolbar button which is found on the flyout of the walk input method side
toolbar , selecting Insert->Manual,
or by right-clicking in the View Window
and selecting Manual from the
pop-up menu. You can only use straight points for digitizing a manual
stitch.
To digitize a manual stitch:
Left-click to input first needle point (penetration).
Left-click again to input the second needle point, and so on. Press the ENTER key to end the manual stitch element.
If a point is entered incorrectly, pressing the BACKSPACE key on your keyboard will remove the points in reverse order.
An example of when to use a manual stitch element would be when digitizing grass. When representing blades of grass with thread, you may not necessarily want needle penetrations throughout the blades of grass.
|
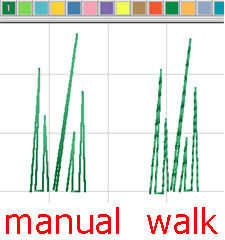
When using walk stitch, needle penetrations are automatically input between the wireframe points, whereas, manual stitch has a long stitch from one wireframe point to the next. |
|
![]()