![]()
Mechanical Head-Up Position:

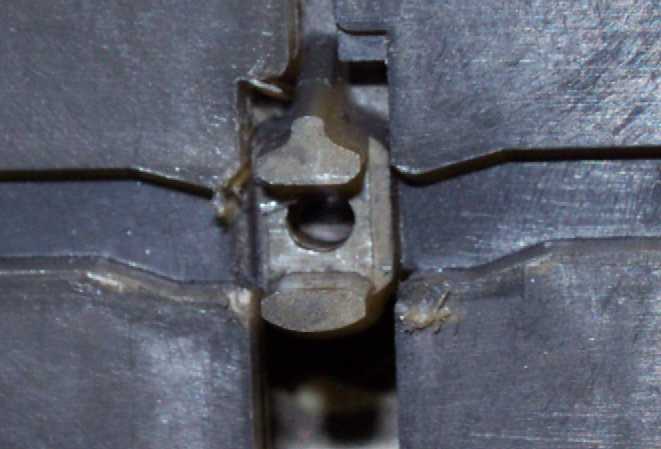
Figure 1 - Reciprocator Drive Groove at "Head Up" Position
Mechanical head up is when the drive slot of the reciprocator (the part that engages the drive stud on the needle bar) is aligned with the needle bar drive slots on the left and right upper arm front covers.
Checking Electrical Head-Up (Z-Home) Position:
Electrically, head up is correct when the mechanical head up is set and the z-position reading on the Head Timing menu is 26 ° ±1 ° . Head up should not be confused with top dead center which is different. When the mechanical head up position is read and you click on the Head Up button in the Head Timing menu and the reading of the Z-position is 26 ° ±1 ° the machine is considered to be "timed."
Remove the needlecase access cover and the needlecase cover.
Turn the machine on.
Start the AMAYA OS software.

Figure 3 - Head Timing Menu
Click Maintenance in the main menu and then click the Head Timing tab.
Click the Head Up command button. This will take the machine to electrical "Head-Up" position.
Click the Bottom Center button. This will put the machine at electrical "bottom center" or "needle depth."
Click Unlock Z. This will release the Z-motor.
Note the Current Z Position reading on the control panel. It should read from 179.5 ° to 180.5 ° .
Grab the needle bar and pull down on it. This will bring the bar and the z-shaft to the lowest point in its movement.
Note the Current Z Position reading on the control panel. If it does not read between 179.5 ° to 180.5 ° , proceed to Adjusting Head-Up. If it reads between 179.5 ° to 180.5 ° , then the machine is timed.
Adjusting Head-Up (Z-Home) Position:
(done after Checking Head Up procedures above are completed)
(This procedure is also referred to as Head Timing)
Remove the left transparent arm cover and remove the back screw from the right transparent arm cover.
Remove the upper arm back cover.
|
|
CAUTION!! Use extreme care not to drop metallic objects, tools, or other conductive material on the Main PCB when you have the base cover removed. If you drop such objects on the Main PCB, it can severely damage the electronics, which will be very expensive to repair. |
Remove the base cover.
Click the Head Up button in the Head Timing tab.
Click the Bottom Center button and then the Release Z button.
Pull down on the needle bar and note the Current Z Position reading in the Head Timing tab. If it is not between 179.5 ° and 180.5 ° , loosen the two screws on the z-home flag and rotate the flag clockwise or counterclockwise depending on the Current Z Position reading.
|
|
NOTE: A small adjustment will change the reading substantially. Make small, incremental adjustments. |
Tighten the z-home flag screws.
Click the Lock Z button.
Click the Head Up button twice to reset the electronics to the newest settings.
Click the Bottom Center button and then the Release Z button.
Pull down on the needle bar and note the Current Z Position reading. If the Current Z Position reading is between 179.5 ° and 180.5 ° , the machine is timed. If the Current Z Position reading is still out of this range, repeat steps #4 through 11 until the Current Z Position reading is between 179.5 ° and 180.5 ° .
When have completed the internal adjustments, install all of the covers previously removed from the machine and tighten the hardware to Melco Torque Specifications.