![]()
Replacement Parts Required:
Selector
1. Remove the screws from the needle plate and remove the needle plate.
2. Using a small flathead screwdriver, twist the knife hold down clip off of the trimmer assembly.
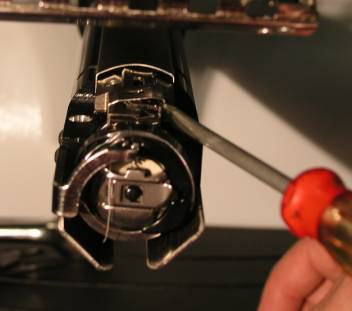
Figure 1: Removal of Knife Hold Down Clip
3. Remove the knife carrier from the trimmer assembly by removing the push-pull cable from the hole in the rear of the carrier and lifting it out.
4. Remove the screw from the left side of the trimmer housing with a 2.5mm Allen wrench.
5. Remove the trimmer housing by taking the push-pull cable out of the hole in the back of the selector. It may help to loosen the screws in the extrusion cover and remove it.
6. Remove the e-clip from the underside of the trimmer housing.

Figure 2: Removal of E-clip
7. Remove the under-thread presser and the locator pin from housing.
8. Replace the selector.
9. Insert the selector locator pin, under-thread presser, and the e-clip.
10. Insert the trimmer housing into the extrusion. Use the dowel pin on the right side for location.
11. It is critical that the trimmer housing be aligned (parallel) with the axis of the extrusion. Using the extrusion cover as a guide is a good way to ensure that proper alignment is obtained.
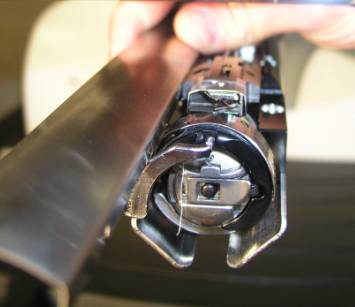
Figure 3: Trimmer Housing Alignment
12. Tighten the trimmer housing screw.
13. Replace the push-pull cable into the hole in the rear of the selector.
14. Replace the knife in the housing, being sure the push-pull cable is through rear hole in the knife.
15. Replace the knife hold down clip.
16. Replace the needle plate.
![]()