![]()
The Y-axis timing belt tensioning requires that the machine is turned off while measuring the tensions. This procedure can be performed by the machine operator as long as the following procedures are followed explicitly.
This procedure requires the use of a Melco 0-10 lb. Force Gauge a Universal Force Gauge Adapter, Y-Belt Tensioning Fixture, a 3mm Hex wrench, and a 7mm nut driver.
|
|
CAUTION!! DO NOT over tension timing belts. If you do, the belts will stretch excessively and might cause heavy internal damage to the machine. |
Attach the Universal Force Gauge Adapter, PN 32498, to the 0-10 lb. Force Gauge, PN 995591-01 (screw adapter on the end of the gauge).
Remove the left and right red transparent arm covers (use 3mm hex wrench to remove screws).

Move the x-beam all the way to the front of the machine until it comes to a dead stop.
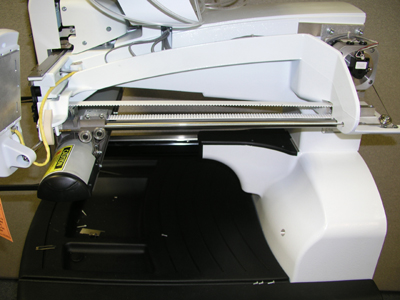
Figure 1 - X-Beam Position
Center the Y-belt tensioning fixture on top of the lower y-belt (see Figure 2).
Figure 2 - Checking Force
Push the force gauge (attached to adapter) down on the upper y-belt until the belt touches the Y-belt tensioning fixture. The force should read 8.1 ± 0.3 lbs.
Repeat steps 4 and 5 for the other side of the machine. If the belt tension on either side needs to be adjusted, proceed to the adjustment procedure.
|
|
Note: If a BRECO meter is used to measure the tension, the measurement should be 45-50 Hz. |
Turn the machine OFF.
Move the x-beam back and forth a few times, bring it to the front to a dead stop, then adjust the tension up or down at the tension adjusting screws indicated in the image below. To increase the tension, turn both adjusting screws clockwise by the same amount. To decrease the belt tension turn both adjusting screws counterclockwise by the same amount.
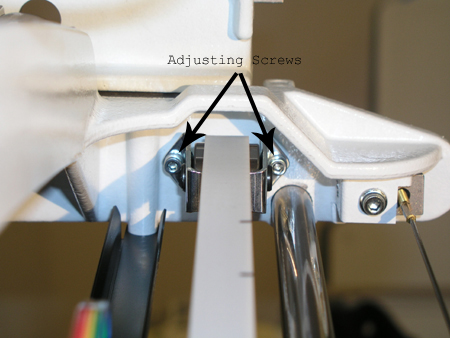
Figure 3 - Y-Drive Timing Belt Adjusting Screws
Reinstall the left and right transparent arm covers.
Do a short machine functional test and observe correct y-axis movements. If the belts travel on the idler pulley off-center to the left or right, readjust the tension starting at the beginning of this section.
![]()