![]()
Under normal operation and with regular maintenance, the typical life span of an AMAYA rotary hook is 1-2 years.
Should you need to replace your rotary hook, use the following procedure. This procedure is not to be used to time a rotary hook already installed on the machine.
Hex Wrench, 2mm
Hex Wrench, 2.5mm
Flat Blade Screwdriver
Make sure your machine is turned on and AMAYA OS is running.
Engage the emergency stop button (by pushing it in).
Push the x-beam all the way to the back of the machine to ensure that the hoop arms will be out of the way during the procedure. (As an alternative to this, you could remove the hoop arms.)
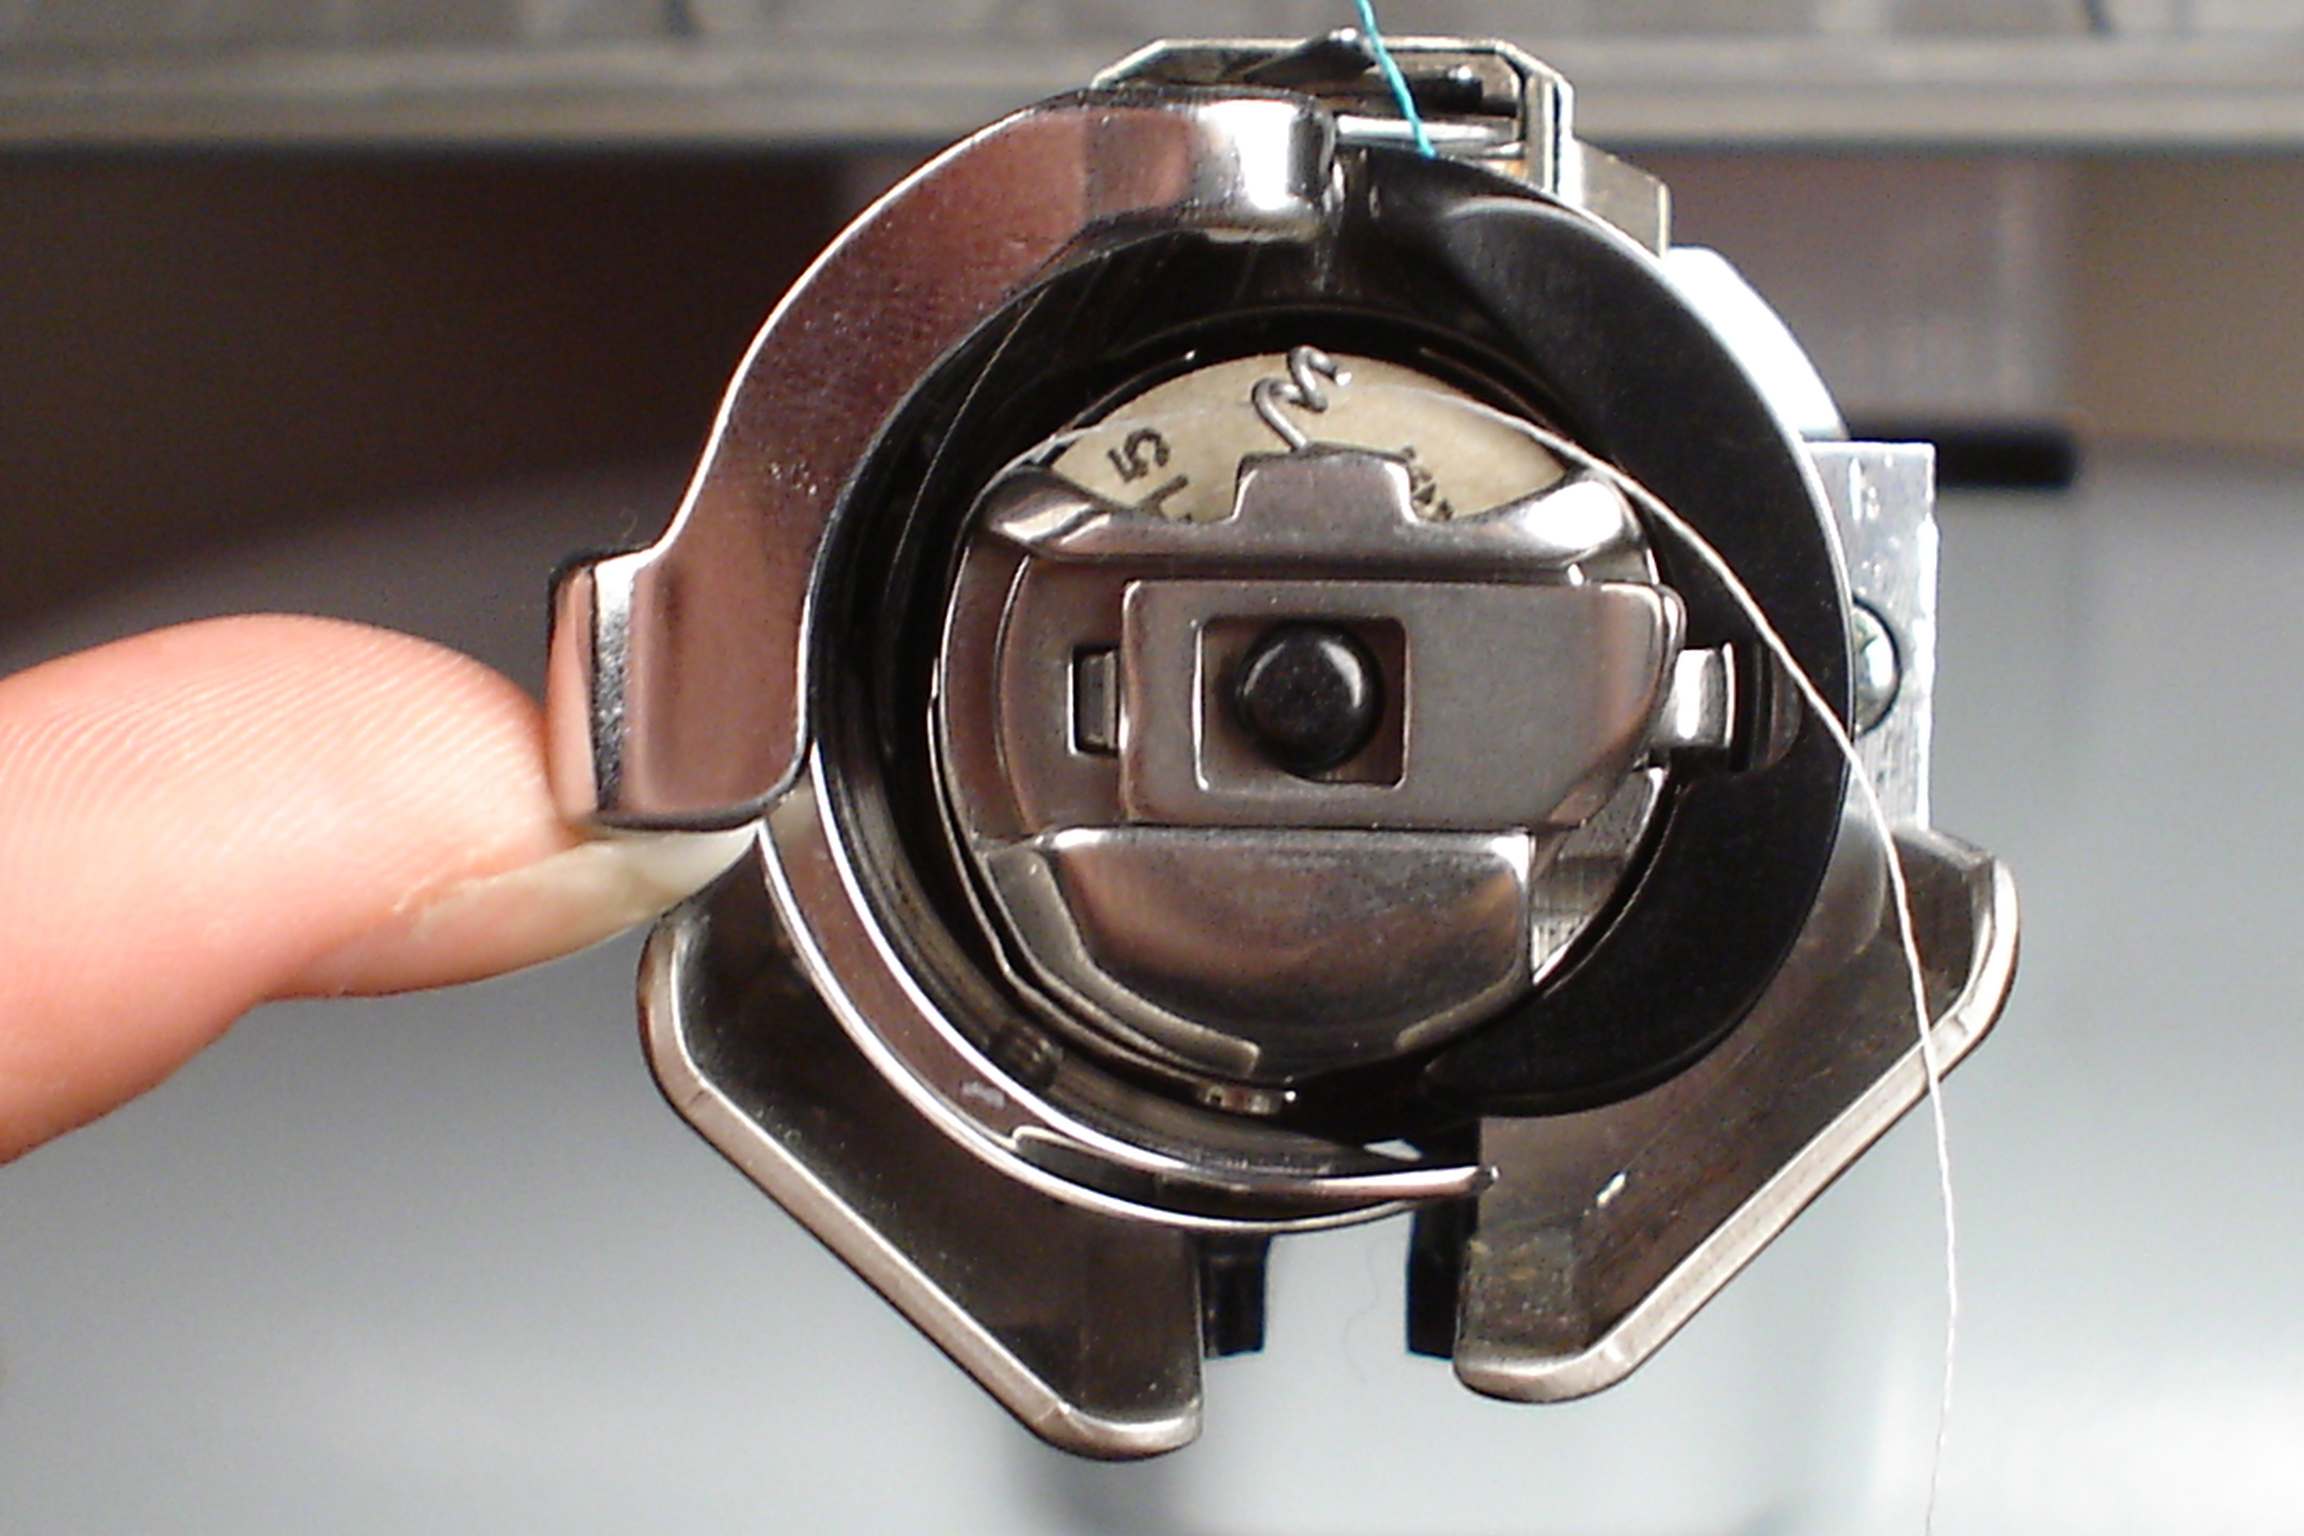
Remove the needle plate, bobbin case, and rotary hook covers (using 2mm Hex wrench).
Disengage the emergency stop button (by twisting it).
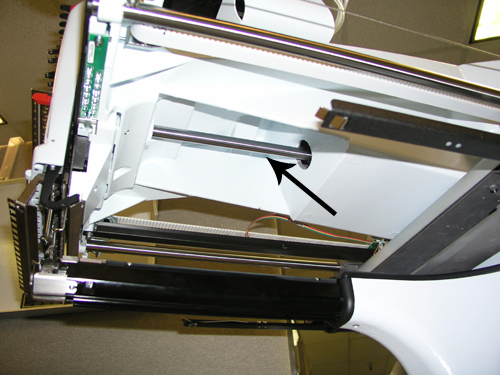
You now need to determine the machine’s “closest needle.” The closest needle is defined as the needle that is closest to the hook basket needle guard and farthest from the hook point. The number of the closest needle is noted in the bottom right corner of the machine casting (under the black base cover). Lift the base cover, then make a note of the closest needle (the closest needle number is identified as C-X, where X is the needle number). You also need to note the z-axis position (measured in degrees) that is written in the same location. See the image below for the locations of these two numbers on the machine casting.

NOTE: If there is not a z axis position written on the machine casting, use 197° for the z position. If there is not a closest needle written,
click here.
After noting the z-axis position, replace the base cover.
Open the Maintenance menu and then click the Head Timing tab. Click the Head Up button (or on the AMAYA keypad, press the Adjustment key ![]() and the Up Arrow key).
and the Up Arrow key).
Use the AMAYA keypad to move the needle case (![]() +
+ ![]() or
or ![]() ) to the needle noted in the machine casting.
) to the needle noted in the machine casting.
When installing the new hook, you will be ensuring that there is adequate clearance between the hook basket needle guard and the back surface of the needle (this is called the needle guard gap). When verifying this gap, the eye of the closest needle must be facing directly forward or be tilted to the right by a maximum of 10°. If the orientation of the farthest needle is not within this range, click here for instructions on changing needle orientation.
On the AMAYA keypad, use the hook rotation function (press and hold the Adjustment key ![]() , then press the Right Arrow key
, then press the Right Arrow key ![]() ) until one of the two screws on the curved side of the rotary hook is exposed on the right side of the needle plate bracket. (See image below).
) until one of the two screws on the curved side of the rotary hook is exposed on the right side of the needle plate bracket. (See image below).

Using a flat blade screwdriver, loosen (do not remove) the exposed screw on the right side. Press and hold the Adjustment key ![]() , then press the Right Arrow key
, then press the Right Arrow key ![]() until the other screw on the curved side of the rotary hook is exposed. Loosen (do not remove) that screw.
until the other screw on the curved side of the rotary hook is exposed. Loosen (do not remove) that screw.
In the Head Timing tab. Click the Head Up button (or on the AMAYA keypad, press the Adjustment key ![]() and the Up Arrow key). The screw on the flat side of the rotary hook will be exposed. Loosen (do not remove) the screw.
and the Up Arrow key). The screw on the flat side of the rotary hook will be exposed. Loosen (do not remove) the screw.

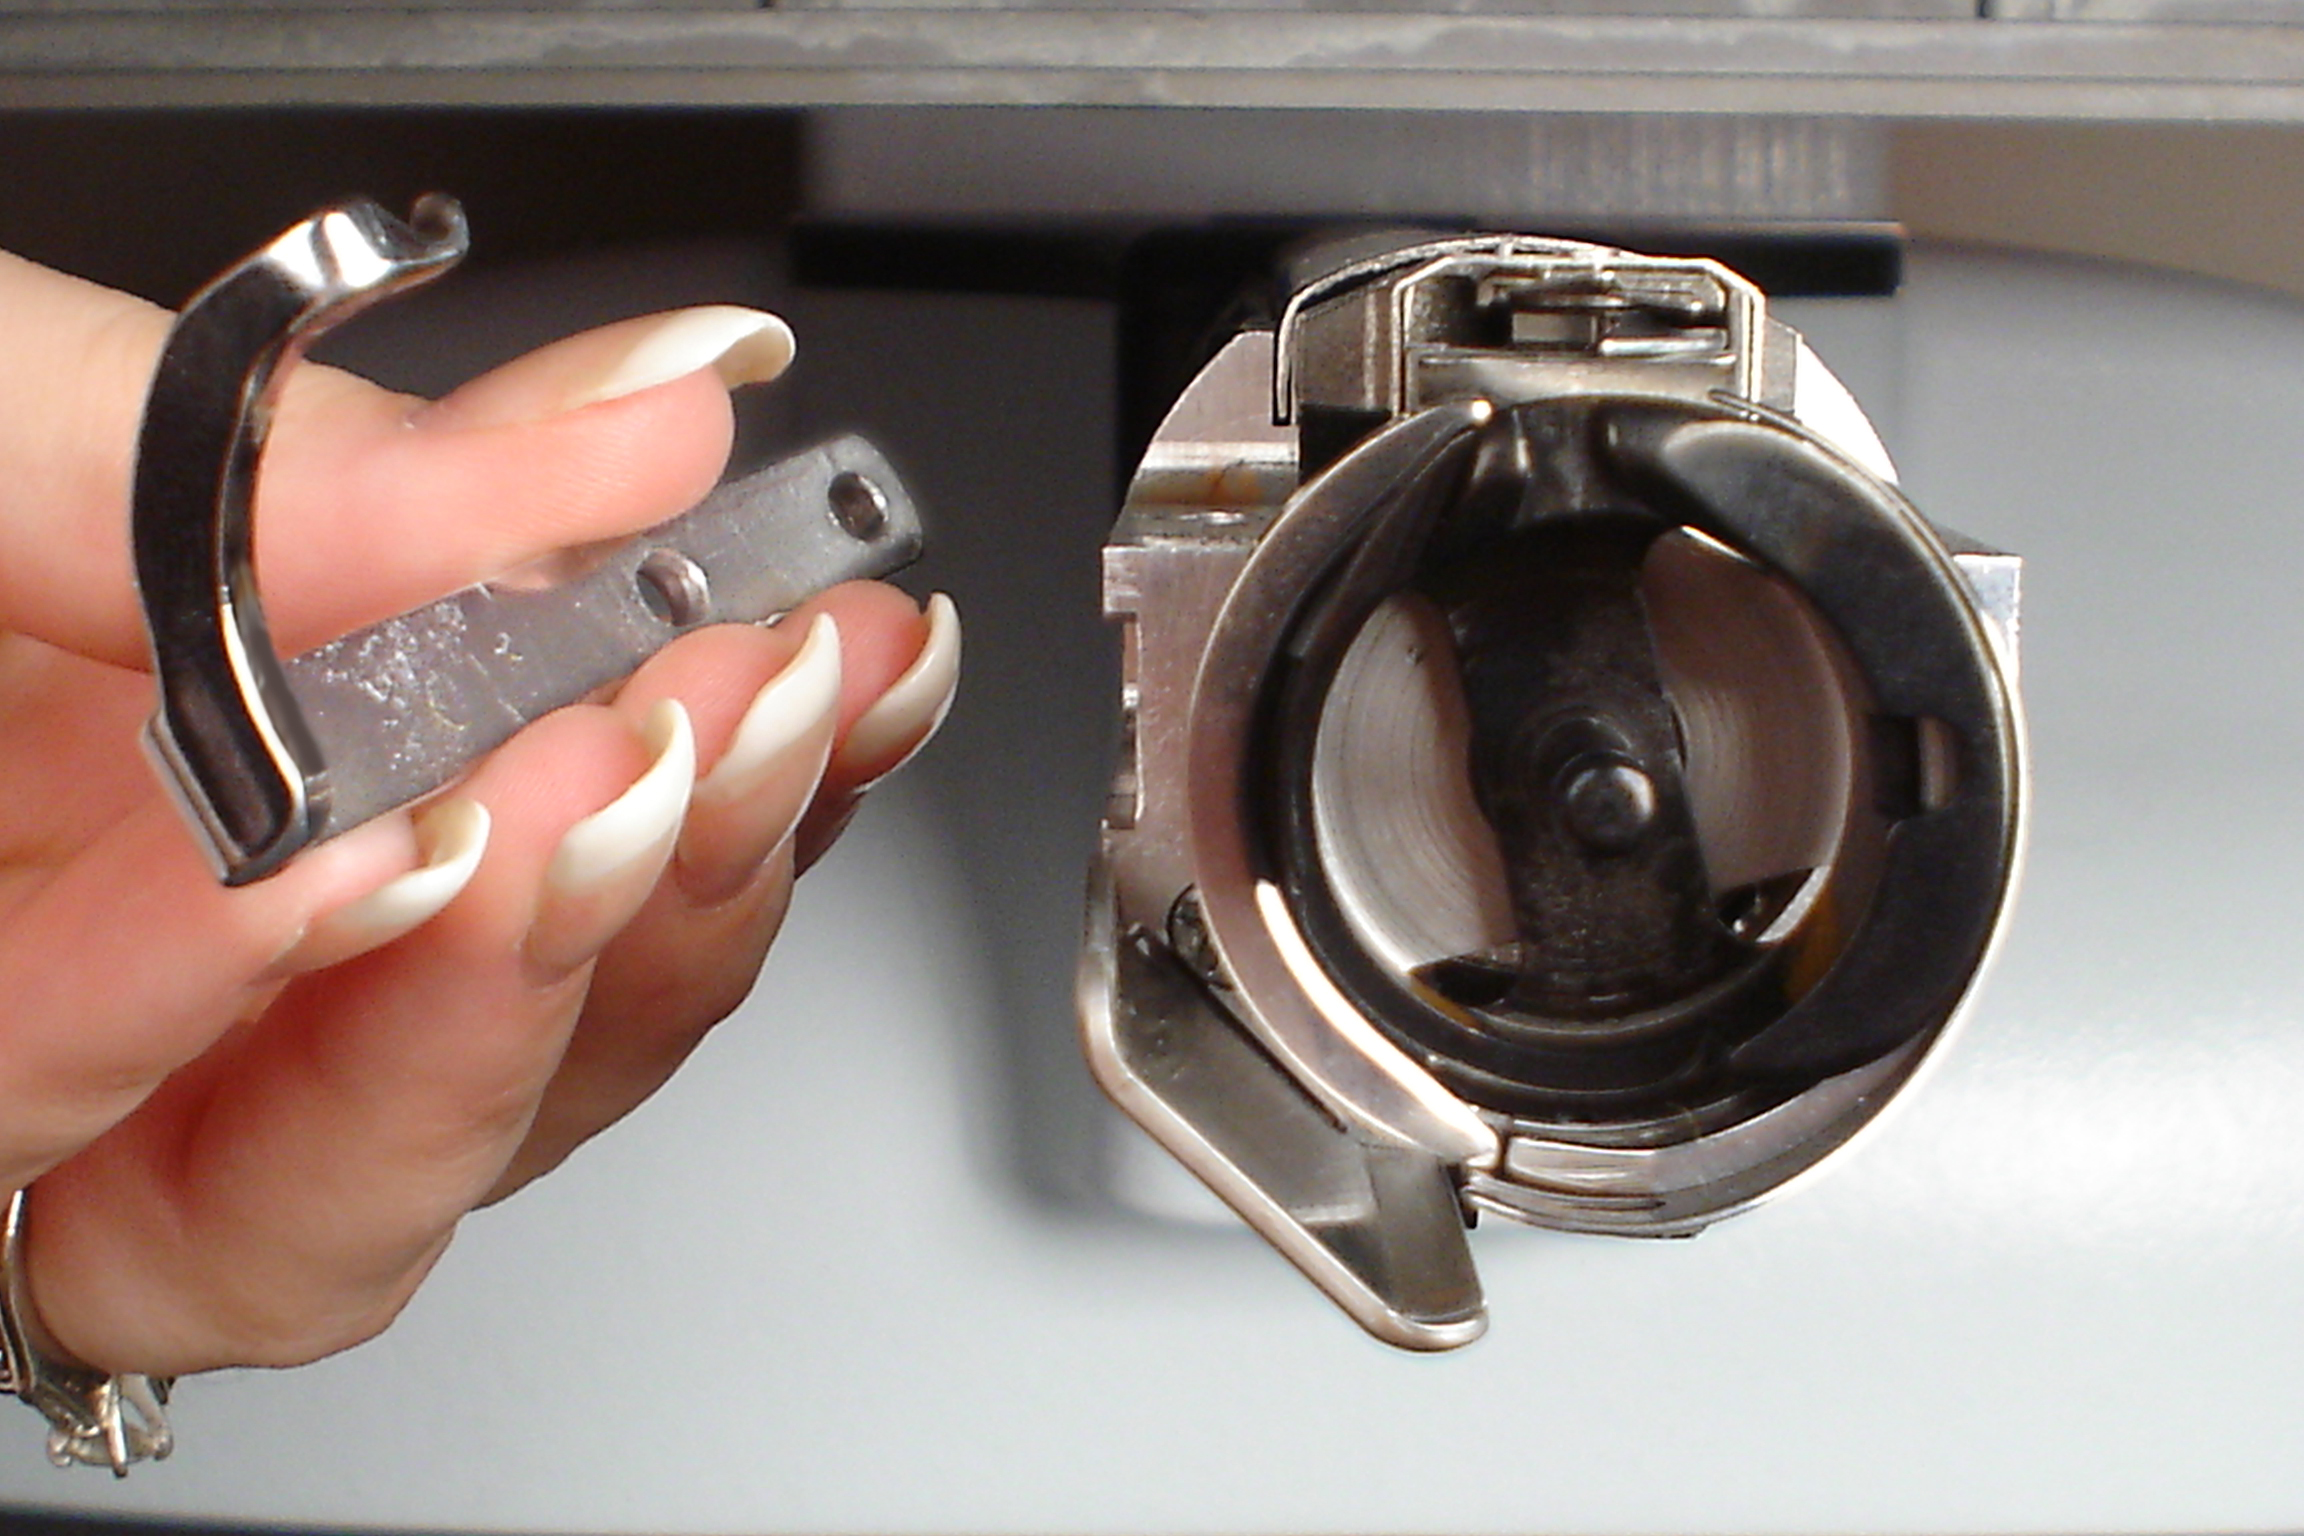
Using a 2mm hex wrench, remove both of the button head cap screws on the left side of the lower arm. Remove the rotary hook support. Then remove the rotary hook.
|
|
|
Replace the rotary hook with a new one and slide it on to the bobbin shaft.
Replace the rotary hook support.
Position the rotary hook support finger in the hook basket to hold the hook basket in place (see the image below). To do this, you may need to move the rotary hook backward/forward and/or rotate it to move it to the correct position.
While holding the rotary hook support in place, re-install the button head cap screws that you removed previously and loosely tighten both screws.
Rotate the hook body all the way around one time. As each screw of the three screws is exposed, slightly tighten each screw. Make sure that the rotary hook body can still be rotated around the bobbin shaft after the screws are slightly tightened.
Turn the rotary hook body until the hook point is positioned just to the left (as you are facing the machine) of the rotary hook support finger.
Press in the emergency stop button to engage it.
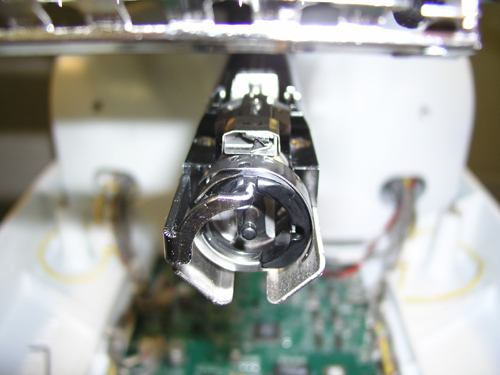
You now need to take the machine to the bottom center position. Because the rotary hook screws are only slightly tightened, you will need to do this manually. Reach inside the access opening in the bottom of the upper arm and turn the z-shaft (see the following image).
![]() WARNING: Never reach inside this opening without first engaging the emergency stop button. Neglecting to engage the emergency stop button could result in personal injury.
WARNING: Never reach inside this opening without first engaging the emergency stop button. Neglecting to engage the emergency stop button could result in personal injury.
Turn the z-shaft approximately (plus or minus one degree) to the bottom center position, which is 180°. (You can determine the z axis position by looking at the Current Z Position in the Head Timing tab; see the following image).

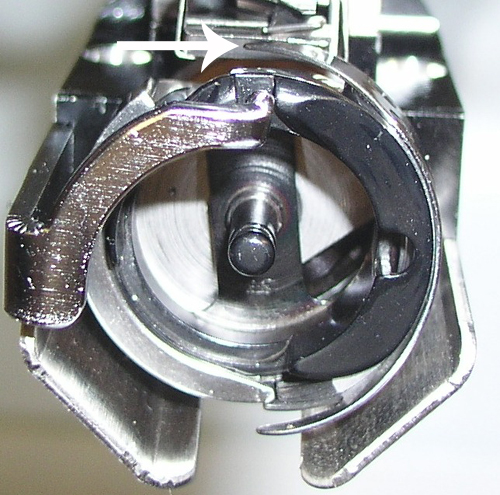
During this process, make sure that the needle passes through the opening in the rotary hook (as shown in the image below).
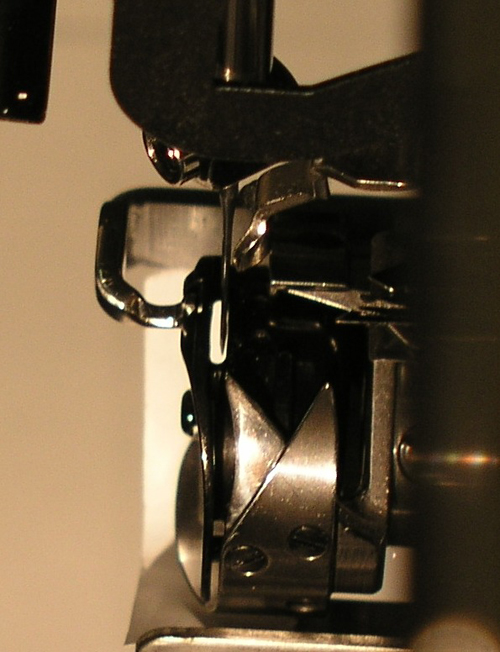
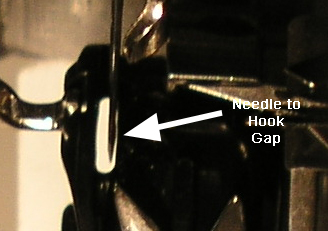
Make sure there is adequate clearance between the hook basket needle guard and the back surface of the needle. The needle should not be touching the hook basket. (See the following image.) You will fine-tune this adjustment as part of the Hook Timing Adjustment procedure.
To inspect rotational timing, you now need to take the machine to the z-axis position written on the machine casting (or to 197 if there was no z-axis position written on the machine casting).
If the z-axis position recorded in Step 6 is a whole number (e.g., 200), use the Set Position box, enter the number in the Set Position box, then click the Goto Position button. Check the number displayed in the Current Z Position box (see image below). This number may not be the exact number you entered. If it is not, use the microstep forward command on the keypad (press and hold the Trace key ![]() , then press the Up Arrow button
, then press the Up Arrow button ![]() ) to increase the z position by tenths (of degrees) until the correct z-axis position is displayed in the Current Z Position box.
) to increase the z position by tenths (of degrees) until the correct z-axis position is displayed in the Current Z Position box.
NOTE: If you microstep too far, repeat steps 14 and 16. Do not microstep backward.
Tighten the screw on the flat side of the rotary hook just enough so that the hook will hold its position when rotated, but can still be moved with your fingers.
Roughly set the gap between the hook support and the rotary hook [this gap should be between 0.019 - 0.039 inches (0.5-1.0mm)]. This gap is indicated in the image below. You will check this distance more precisely when you fine-tune hook timing.

On the AMAYA keypad, use the hook rotation function (press and hold the Adjustment key ![]() , then press the Right Arrow key
, then press the Right Arrow key ![]() ) until the other screw on the curved side of the rotary hook (the screw that has not yet been tightened) is exposed on the right side of the needle plate bracket. Tighten this screw just enough so that the hook will hold its position when rotated, but can still be moved with your fingers.
) until the other screw on the curved side of the rotary hook (the screw that has not yet been tightened) is exposed on the right side of the needle plate bracket. Tighten this screw just enough so that the hook will hold its position when rotated, but can still be moved with your fingers.
In the Head Timing tab, click the Head Up button, then the Bottom Center button (or on the AMAYA keypad, press the Adjustment key ![]() and the Up Arrow key to go to Head Up, then press the Adjustment key and the Down Arrow key to go to Bottom Center.)
and the Up Arrow key to go to Head Up, then press the Adjustment key and the Down Arrow key to go to Bottom Center.)
You now need to fine-tune the hook timing position by using the Hook Timing Adjustment procedure in this help system. Click here to begin this procedure at the correct step (step #12).
![]()