Nozzle checks are performed to check the performance of the print head nozzles.
To perform a nozzle check:
- Move the table to the load position by pressing the Eject
button on the table control panel.

- Place a transparent film page at the top left corner of
the table.
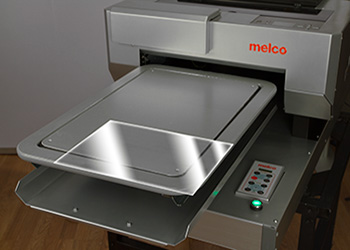
- Adjust the height of the table by pressing the Auto button
on the table control panel.

- Move the table to the print position by pressing the Home
button on the table control panel.

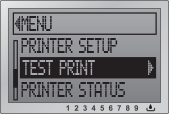
- Use the buttons on the printer control panel to navigate the menu and perform a nozzle check.
- Press the menu button (right arrow)

- Scroll down to "Test Print" and press the
right arrow to continue.
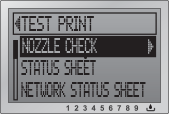
- Scroll down to "Nozzle Check" and press the
right arrow to continue.
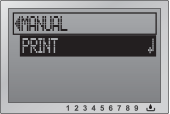
- Use the right arrow to select the "Manual"
option.
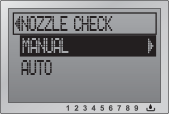
- Press the enter key to select the "Print"
option.

- A nozzle check will be printed. A perfect nozzle check should look like the one below.

Make sure that the ink assignment is correct and as shown. If
you see any gaps as shown below, perform a power cleaning from
the printer control panel.

To perform a power clean, see the power clean section of this document.