Initial Maintenance
AMAYA OS provides timers that will prompt you when you need to perform maintenance on your machine. However, it is recommended that you lubricate all points after setting up your AMAYA. This will ensure that your machine is properly lubricated for operation. To use the step through instructions provided by AMAYA OS, select Tools > Settings > Timers Tab. You will notice that each timer has a corresponding Step button. When you click this button, you will be led through the maintenance steps for that timer. When you successfully complete the steps for a timer interval, the timer will be reset.
You can also use the written procedures provided in this manual to perform the initial maintenance. Click here for these procedures.
Before you begin sewing Melco recommends that you perform the following. Click on the link to perform the initial maintenance steps below.
Rotary Hook
-
Remove the bobbin case from the rotary hook.
-
Place 1-2 drops of sewing machine oil in the rotary hook as shown. Be careful not to apply excessive amounts of oil. The oil is located in your Operator's Kit.
-
Install the bobbin case back into the rotary hook. For instructions on how to do this Click Here.
Needle Drive
-
Color change to needle #16. To do this use the Keypad.
-
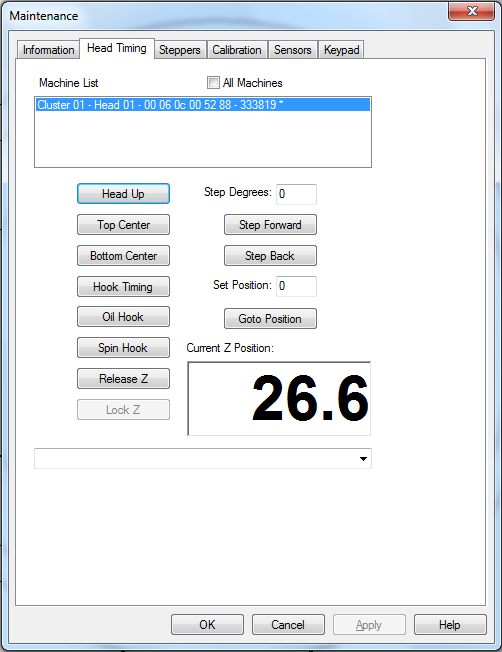
In AOS select Tools > Maintenance > Headtiming and you should have the following menu.
-
From Tools > Maintenance > Headtiming > Click > Top Center - 
-
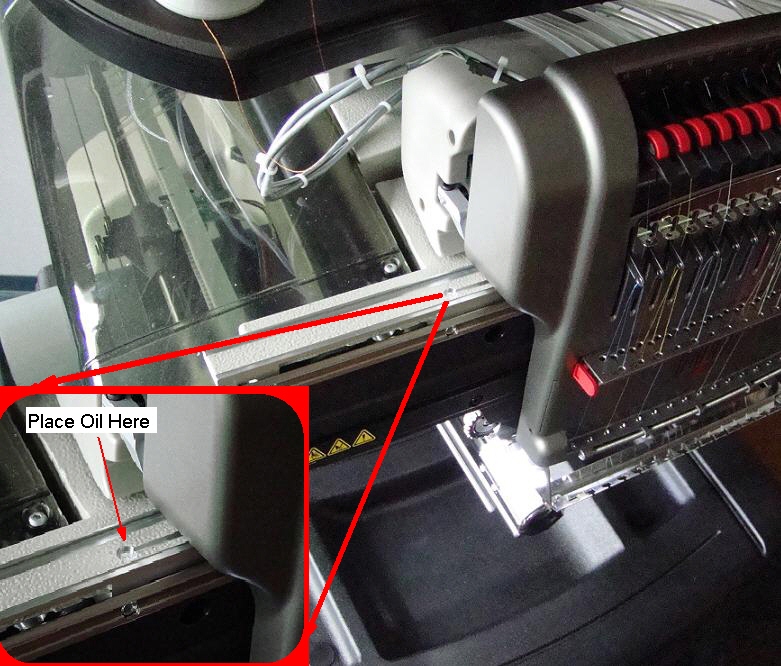
Put 25 drops of sewing machine oil in the oiling channel located to the left side of the needle case.
-
Allow the machine to sit without running for 5-10 minutes to allow the oil to distribute correctly.
-
From Tools > Maintenance > Headtiming > Click > Head Up - 
Needle Case
-
Remove the magnetic needle case access cover by pulling it towards you slightly and sliding it off the needle case to the left or right.
-
Add 1-2 drops of sewing machine oil to each needle bar at the bottom of the needle case. When finished, reattach the needle case access cover.
-
Apply 1-2 drops of sewing machine oil directly to each needle bar located just behind each "take up lever" as shown below. To see where the "take up levers" are located, review the Machine Overview.
-

-
The initial lubrication is now complete.


