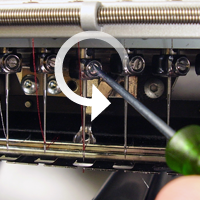
- Make sure the safety grabber blade is in the back position before changing a needle. If it is not, press the Adjustment and Center keys on the AMAYA keypad to move the grabber back.
- Press the Emergency Stop button to prevent the accidental starting of the machine.
|

|
WARNING! Failure to engage the emergency stop button on the AMAYA while removing or replacing needles can result in the machine starting through machine or operator error. This can result in damage to the machine and/or serious personal injury.
|
- Above each needle is a needle clamp set screw that holds it in place.
- Using a small flat-blade screwdriver, turn the needle clamp set screw counterclockwise about a half of a turn, until the needle can slide down and out of the needle bar. Do not loosen too much or remove the set screw. Loosen the screw just enough for the needle to be removed.
- Remove the needle by pulling down on the needle.
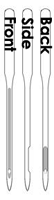
- Embroidery needles have a front and a back side. The new needle must be installed correctly or the sew quality may suffer. If you install the needle incorrectly, you my also get thread breaks. The front of the needle has a long groove (thread guide), while the back has an indented notch (scarf).
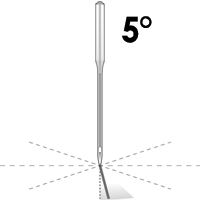
- With the thread guide facing forward and the scarf facing back, slide the needle up and into the needle clamp as far as it will go. The eye of the needle should then be turned 5° to the right. The acceptable range is 0° - 20° to the right.
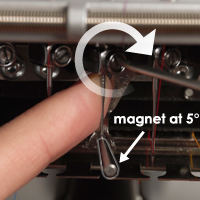
- A needle orientation magnet (PN 34274) may be used to help determine the angle of the needle eye. This cylindrical magnet can be temporarily attached to the front of the needle just above the eye. The end of the magnet will rest on each side of the thread guide and stick straight out from the needle. This will better indicate the angle of the eye. For reference, one minute is 6° on a clock face.
- While holding the needle in place, re-tighten the needle clamp set screw to hold the needle in place.
- Remove the magnet before sewing.
|

|
