![]()
Note: When sewing a design that uses the Settings by Color feature, make sure that Use Machine Settings from Design is turned on in the Settings tab so that the settings by color will be used. (Click here for more information).
When sewing an applique or tackle twill design, thread feed will need to be adjusted at the point where the applique begins sewing (because of the increase in fabric thickness). You can do this by using the Settings by Color feature in AMAYA OS.
Note that you can also use this method with sewing with 3-D foam, because you will need to increase material thickness when stitching in the foam.
|
|
Note: When sewing a design that uses the Settings by Color feature, make sure that Use Machine Settings from Design is turned on in the Settings tab so that the settings by color will be used. (Click here for more information). |
Adjusting the Settings by Color is a simple way to sew an applique. You can use this setting to increase the material feed of the thread used to sew on the applique.
As an example, if you were sewing a simple heart applique design (2 color design, with no lettering), you could use Settings by Color to complete the following procedure.
Open the Settings menu or click on the Color Sequence tab, then select the Settings by Color tab.
Check the Settings by Color box.
Left-click the color box numbered 1. You can now edit the settings for color 1. This means that all stitches sewn with this color will use the machine settings for this color.
Left-click the color box numbered 2. You can now edit the settings for color 2.
Increase the material thickness of color 2. This material thickness will depend on the type of applique fabric you are using.
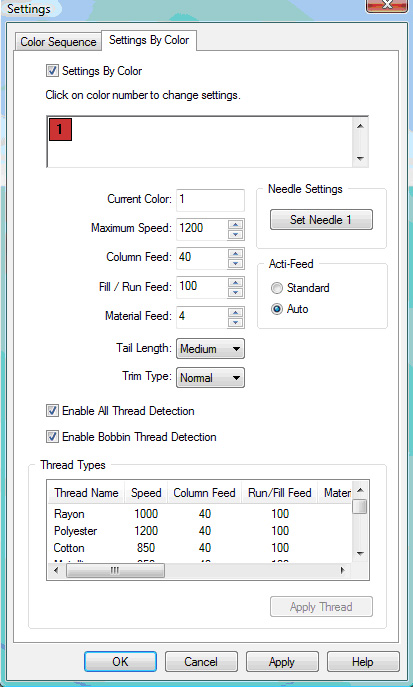
Click OK. This will close the Settings by Color tab and apply your changes.
Click the Color Sequence tab. This will bring you to the color sequence dialog box.
Click the Clear All button.
Click the desired number in the thread cone display for Color #1. Color #1 is the applique cut line.
Click the Applique button. This is the Applique Stop – this causes the hoop to move forward when it stops for the Applique so you can place the applique on the fabric.
For Color #2, click a number in the thread cone display. Color #2 is the color of thread for the column stitch around the heart.
When you have finished setting up the color sequence, click the OK button.
When you are ready to sew the design, press the Start button ![]() .
.
When the machine stops for you to place the applique on the fabric, you will need to press the Start ![]() button when you are ready to continue sewing the design.
button when you are ready to continue sewing the design.
Please note that not all applique designs will be sewn exactly like the example above. The exact procedure will be determined by the design you are sewing. For example, the applique may start on Color #4 of a more complicated design, or the design could contain lettering.