For this maintenance procedure, you will need to inspect each thread feeder roller. Repeat the following procedure for each roller:
(This section provides part numbers for the parts you may need to replace. Please note that it is possible for part numbers to change after the release of this help system).
-
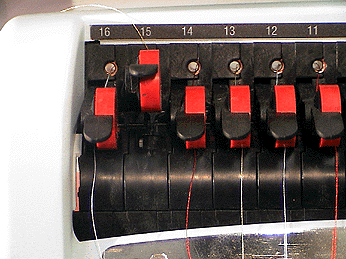
Lift the thread feeder lever.
|
|
-
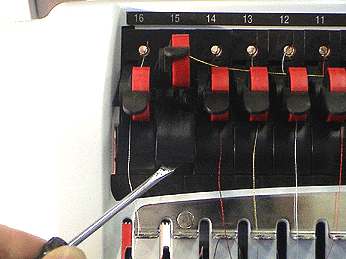
Remove the thread feeder front cover, carefully using your fingernails or a screwdriver.
|
|
-
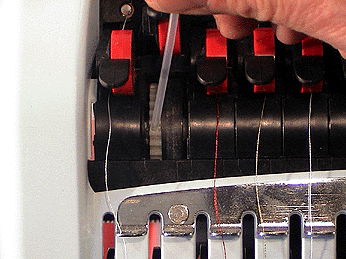
Using your finger or a dull plastic object, such as a plastic spoon handle, coffee stirrer, etc., press gently on the thread feeder gear to carefully rotate the roller.
|
|
-
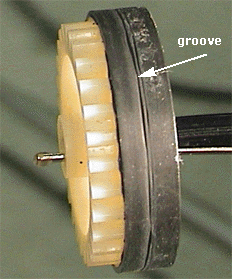
As you rotate the roller, inspect it for wear, nicks, or a groove in the rubber (the figure to the right displays a roller with a groove in the rubber).
Also check the roller for dust, lint, oil, or grease accumulation. Please note that it is possible for rollers to become coated with silicone (from certain threads, such as rayon thread). This silicone makes the surface of the roller very slick and needs to be removed.
|
|
-
If the roller needs to be cleaned, remove any dust or lint with your fingers. If you need to remove oil or grease, use a cotton swab soaked in alcohol. The roller can also be removed to be cleaned (see the next step for instructions).
|
-
If the roller is worn or damaged and you have experienced problems such as birdnesting inside the thread feeder, thread breaks, looping stitches, and skipped stitches, then replacing the grooved roller may be a possible solution. It will need to be removed and replaced with a new roller (Melco PN 30615-01).
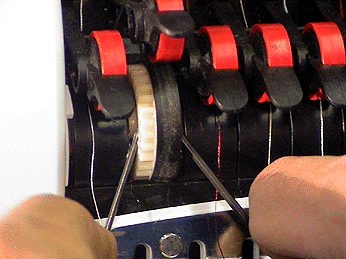
To remove the roller, using two thin bladed flat screw drivers, carefully pry the roller out of the assembly (as shown in the figure to the right) until you can pull it out easily with your fingers.
Once the roller is pried out enough to grab onto it with your fingers, pull it the rest of the way out.
|
|
-
Locate a new roller if you have determined the roller needs to be replaced. If the roller does not need to be replaced, you can re-install the roller you removed.
-
Before you install the roller, it is recommended that you lubricate the thread feed wheel hubs (see Thread Feed Wheel Hubs for instructions).
|
-
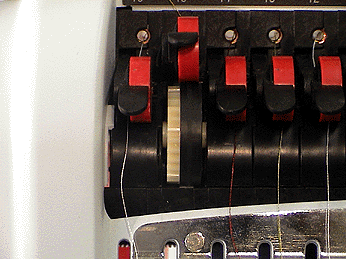
Align the roller in place as shown in the image to the right, and push it all the way in until it snaps into place.
|
|
-
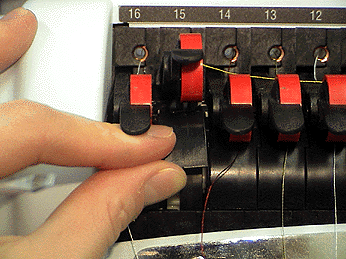
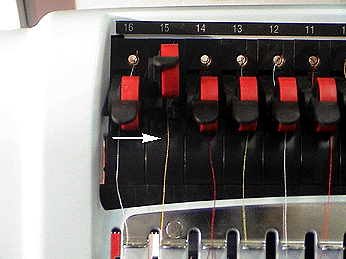
Re-install the cover by moving the thread out of the way and inserting the top end of the cover into the slot at the top of the thread feeder assembly and then pushing it into the assembly until it snaps back into place as shown in the top image to the right. Make sure the thread is centered (critical) over the thread feeder front cover as shown in the lower image to the right.
|
|
-
Rethread the machine if necessary, make sure the thread is centered in the grooves on the thread feeder front cover as shown in the above figure, and push the thread feeder lever back down.
|
You also need to check for wear on the red pinch rollers of the thread feeder assembly.
-
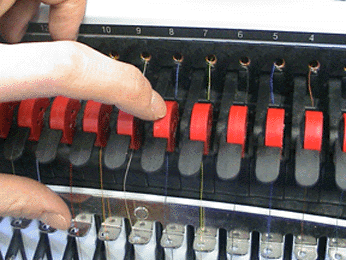
Visually inspect each red pinch roller. If you detect a line in the center of any of the pinch rollers, run a fingernail across each of these rollers to check for grooves worn in the rollers.
Please note that lines on the surface of the rollers are the result of normal operation. However, deep grooves in the roller material can affect the operation of the thread feed system.
|
|
|
If you detect a groove in a roller, and the thread fits into the groove such that the top of the thread is lower than the surface of the roller, then the roller needs to be replaced (Melco PN 30619). The diagram below displays a view from the front of a grooved pinch roller that needs to be replaced.
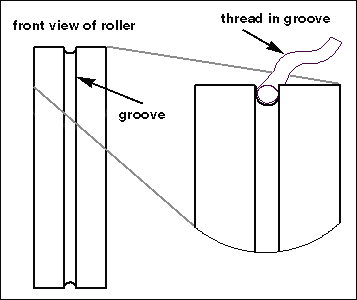
If the groove is small enough that the top of the thread is higher than the surface of the roller, and you have not experienced any problems with the thread feed system, the roller does not yet need to be replaced. If you have experienced problems such as birdnesting inside the thread feeder, thread breaks, looping stitches, and skipped stitches, then replacing the grooved roller may be a possible solution.
|
-
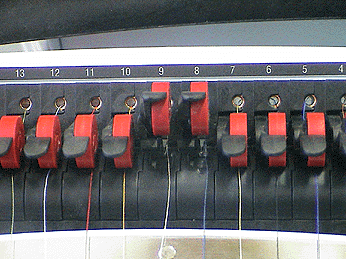
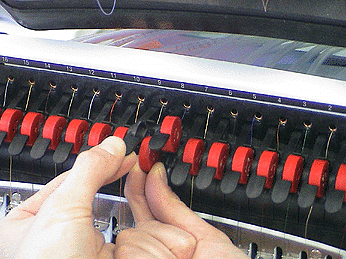
If a roller needs to be replaced, lift its thread feeder arm and the thread feeder arm directly to its right.
|
|
-
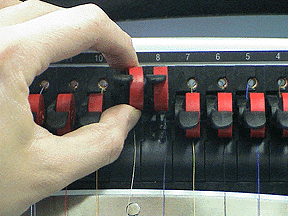
Push the roller to the right to snap it off of the thread feeder arm.
|
|
-
While slightly lowering the thread feeder arm with one hand, use your other hand pull out the roller.
|
|
-
To install the new roller, again slightly lower the thread feeder arm, and slide the roller on to the arm.
-
Raise the thread feeder arm and snap the roller into place by pushing it toward the thread feeder arm.
|
![]()