
(Available in DesignShop Pro and higher product levels)
Decorative stitch is used to repeat a digitized design along a walk input line. Decorative stitches can consist of walks, columns, fills, and lettering or a combination of elements.
You can choose from several decorative stitches included with Design Shop or create your own.
To select an existing decorative stitch, right-click the Walk
Decorative Stitch tool on the Input toolbar. You can also select
Insert->Decorative Stitch, or you can right-click in the View Window and select Decorative
from the pop-up menu.
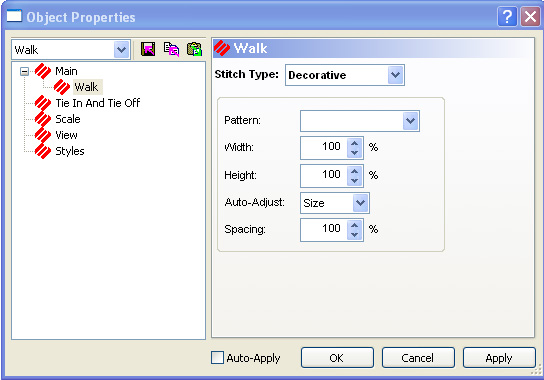
Choose the stitch that you want to use from the pull-down menu.
You can resize the decorative stitch by changing the width and height percentages of the original digitized design. You can also change the spacing of your decorative stitch and make the stitches either closer together or further apart. 100% means touching, more than 100% means spaced further apart, and less then 100% means overlapping.
Click OK, then digitize the same as a normal walk stitch using straight and/or curved input points.
To Create a New Decorative Stitch:
Creating a new decorative stitch uses the same procedure that is used in Custom Shapes and Designs. See Custom Shapes and Designs for more information.
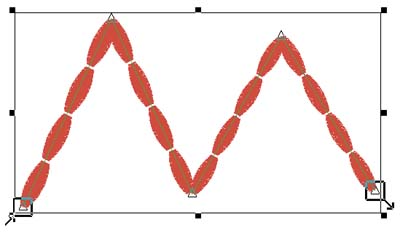
Spacing Decorative Stitches:
The double handle that appears controls the spacing of the decorative stitches. Click and drag this handle to move the stitches closer or further apart. See picture below:
To digitize a decorative stitch:
Select the complex fill you want to change by left-clicking inside of it. Remember that you can determine if an element is selected if it has a box around it and its wireframe points are shown.
Select the insert outline tool  .
.
Now digitize the wireframe outline of the hole (following the same procedure as a complex fill).
When finished, press ENTER.