DesignShop offers many tools that allow you to customize your work environment to your preferences. This section describes these tools.
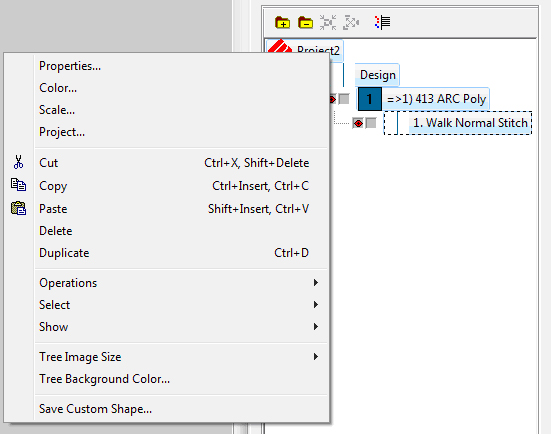
In DesignShop, it is very easy to customize projects to adapt them to your preferences. Right-click the project in the Project Tree View, then select Project from the pop-up menu.
Then click on the Project tab, and the following dialog will be displayed:
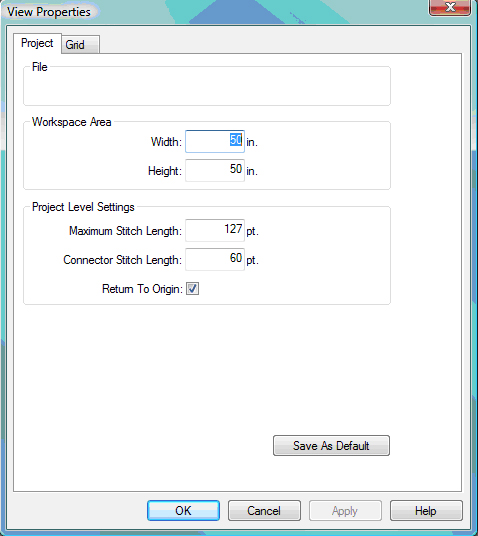
File: The location and file name of the project will be displayed here.
Workspace Area: The Workspace Area is the area within the View Window where you do your editing and digitizing. If your stitches fall out of the Workspace Area, you can use the scrollbars to move around your project. You can also change the height and the width measurements by clicking in the white area and typing the desired measurement. You can click the Save As Default button to have new projects open with the desired measurements.
Project Level Settings: These settings let you change the Maximum Stitch Length for all elements within a project and the Connector Stitch Length throughout a project; you can also turn on/off Return To Origin at the project level (the default is On).
Save As Default: Any time that you change a setting or settings and click the Save As Default button your changes will be saved and will become the default settings. Even if you exit out of DesignShop and get back in again, your default settings will be saved.
Naming the designs in your projects is another way that you can customize your work environment. Click on the design name and wait a moment, not moving your cursor. The design name will be highlighted with a flashing cursor. You can type the name you want for your design and hit Enter to change it.
If you would like to change the color of the background of your workspace (the View Window area behind the design), click on the following area of your color palette:
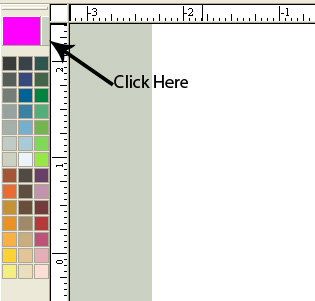
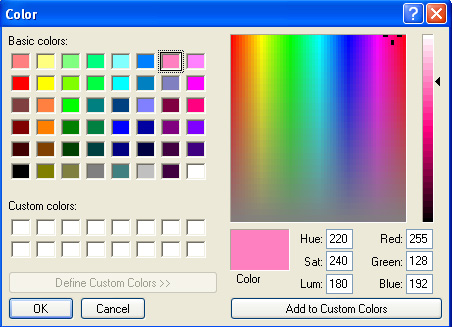
This will open the Color Properties dialog:

Select a background color from the color chart and click OK.
To change the background color of the Tree View, right-click on an area of the tree and select Tree Background Color...
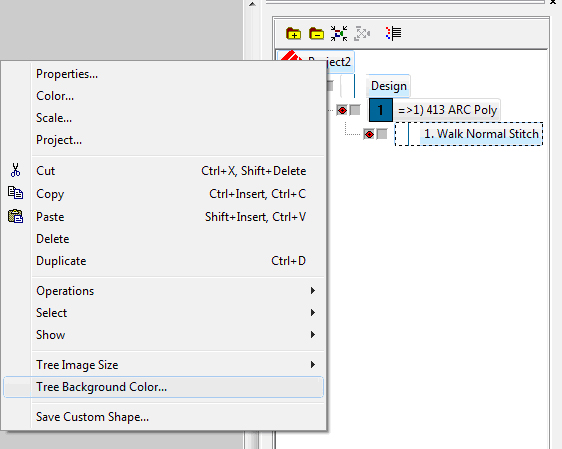
The following dialog appears:
Select your color and click OK.
You can also display a graphic as the background of your workspace. The purpose of a graphic background is to provide a view of the embroidery design against a graphic of fabric.
To display a fabric on your screen, right-click on any existing color box in the Color Palette and select Properties to display the Color Properties dialog box. Click on the Graphic Background tab.
You can now select a fabric file that will be displayed into the background of the View Window. To display a fabric, click the Browse button. Navigate to the DesignShop install directory (usually C: Program Files directory/Melco Embroidery Systems/DesignShop/Fabrics). While in this directory you will be able to see thumbnail images of the graphic backgrounds/fabrics. Select a fabric from the list and click Open.
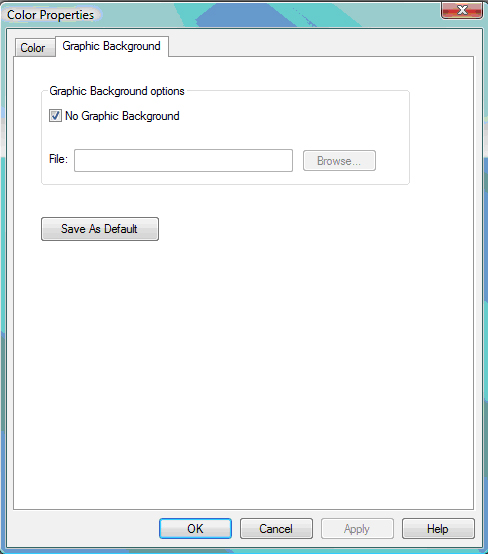
Click Apply to immediately see the fabric on your screen.
If you want to turn off the graphic background, check (left-click)) the box next to No Graphic Background.
The Preferences tab allows you to adjust several DesignShop settings. To access these settings, select Tool->Options, then click the Preferences tab.
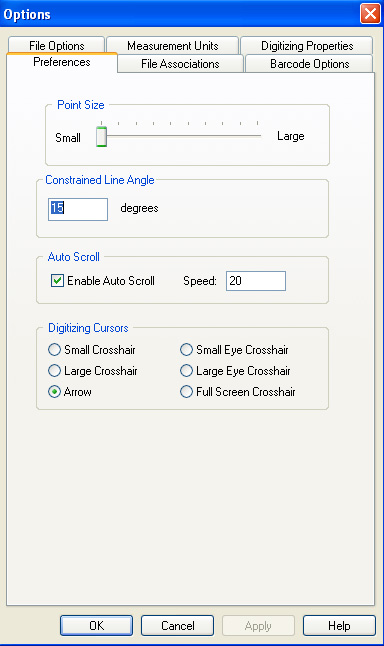
You have the option of changing the size of wireframe and stitch points when you view them in the View Window. After you change the size, any points you digitize will be the new size. However, previously digitized points will not reflect the size change. If you close DesignShop, then re-open it, all points will reflect the size change.
(Available in DesignShop and higher product levels)
Design Shop allows you to input a straight horizontal, vertical, or angled line. To do this, use the following procedure:
Select the digitizing tool you wish to use (e.g., walk stitch).
Input the first digitized point.
Press and hold down the ALT key on your keyboard. You will see a line appear on your screen.
Move the mouse to the desired position of the
line.
Notice that the line will only be drawn at certain angles. This is
based on the contained line angle value that is entered in the Editing
Properties tab. The default value is 15 degrees, but you can enter
any value you choose (between 1 and 90 degrees).
You can also use the constrained line when editing wireframe stitch points/lines. To do this, select a point you want to move. Press and hold down the ALT key as you drag the point. Notice that the wireframe line is straight and is displayed at certain angles (e.g., every 15 degrees).
(Available in DesignShop and higher product levels)
Auto Scroll works as you are in the middle of digitizing an element. When you move your cursor out of the view window, auto scroll will scroll the view window to follow the direction of your cursor. You can change the speed of the auto scroll from 1 to 100, with 100 being the fastest. The default is that this feature is turned on. Uncheck the Auto Scroll box if you don't want it to be turned on.
This setting allows you to choose from several available digitizing cursors (the cursor that is visible while you are digitizing). The choices are: Arrow (which is the default), Small/Large Crosshairs, Small/Large Eye Crosshairs, and Full Screen Crosshair. To select a different digitizing cursor, left-click the cursor's radio button and click the Apply button.
You can change the file options by selecting Tools->Options, then selecting the File Options tab. See File Options for more information.
You can change the measurement units by selecting Tools->Options, then selecting the Measurement Units tab.
You have the option of changing the measurement units on the properties listed. You can have the units in embroidery points, millimeters, centimeters, inches, or french inches.

You can change the barcode options by selecting Tools->Options, then selecting the Barcode Options tab. See Barcode Options for more information.
You can change the digitizing properties by selecting Tools->Options, then selecting the Digitizing Properties tab. See Tablet Digitizer for more information.