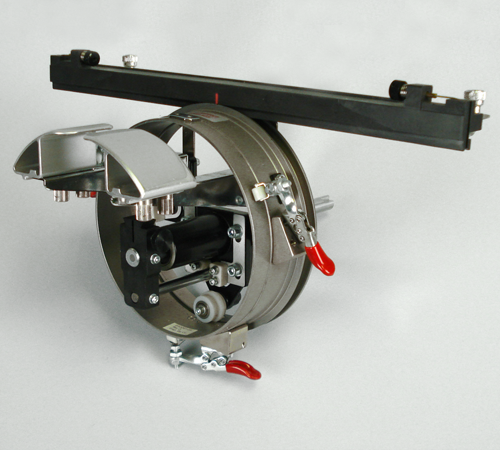

|
|
CAUTION! You must ALWAYS select the proper cap frame hoop in AMAYA OS when sewing with cap frames. Failure to do so may result in damage to your equipment! |
The steps in this section describe how to install the driver after it has been previously installed and adjusted. If you have not installed the driver previously, or this has not been done for you, refer to the First Time Installation and Adjustment section. To install the cap frame driver on AMAYA, follow these steps:
|
|
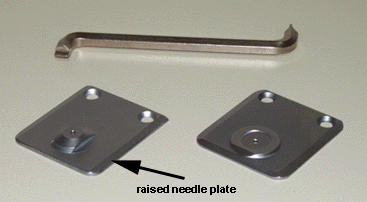
Important: For sewing on caps, Melco recommends using the raised needle plate (Melco P/N: 32196) that is included in the Wide Angle Cap Frame Driver Kit. |
Remove the tabletop (if you have this option installed).
Remove the tubular support arms from the AMAYA (if they have not been removed).
Select the Wide Angle Cap Frame (WACF) hoop in AMAYA OS.
Center the hoop by clicking the Hoop Center button ![]() in AMAYA OS.
in AMAYA OS.
In the Operator’s Kit, locate the special tool that will allow you to remove the standard needle plate off the machine. Locate the Raised Needle Plate in the driver box. Remove the Standard Needle Plate by loosening both screws holding it in place and assemble the Raised Needle Plate to the machine instead.
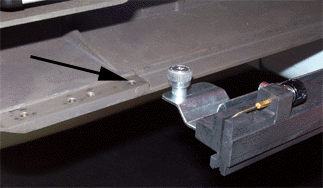
Under the cylinder bed of the AMAYA, locate the cap frame mounting brackets (see image below):
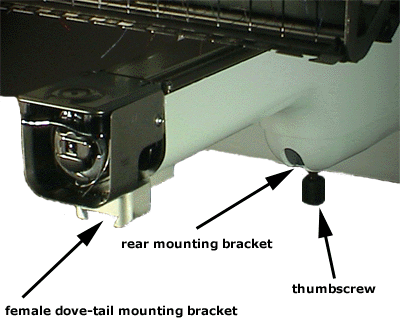
Loosen the thumb screw on the rear mounting bracket on the machine.
Loosen the thumb screw on the male dove tail bracket on the cap frame driver (see image below).
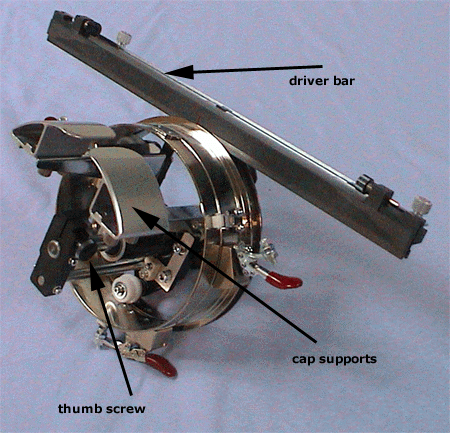
Guide the cap driver shaft into the hole in the rear mounting bracket. At the same time, insert the driver male dove-tail bracket into the machine female dove-tail mounting bracket.
Push the cap frame driver shaft into the bracket hole until it reaches a positive stop.
Tighten the thumb screw on the AMAYA's rear mounting bracket.
Tighten the thumb screw on the male dove-tail bracket.
Move the beam forward; position the two thumbscrews located on the rear-mounting bracket over the left and right most inner mounting holes on the carriage and loosely tighten them (start one thumbscrew but do not tighten it all the way before you start the second fastener). The thumbscrews must be screwed in straight (not at an angle) to avoid damage to the inserts in the X-carriage holes. If there is any resistance when tightening either screw, stop, unscrew the thumbscrew and reposition before starting again. After both thumbscrews have both been started in the correct position, tighten them securely with a Phillips screw driver or 6mm Hex wrench (depending on the type of thumbscrews your driver has) to prevent the thumbscrews from coming loose.
|
|
Note: Always install the driver on the mounting brackets first, then attach the driver to the beam. This will improve overall sew quality. |