This section provides instructions on how to use the XT Wide Angle Cap Frame (XT WACF) with your AMAYA machine. Click on any of the links to below to quickly access a topic in this section.
Before sewing with the XT Wide Angle Cap Frame, you must select it in AMAYA OS. To do this, go to the Machine Views toolbar in AMAYA OS. Select the cap frame that corresponds to your driver. For example, "Graphite XT WACF". For more information, see the Hoop Selection section of this manual.
The height of the sewing field varies on caps because of the variation in crown sizes and shapes. The crown of the cap is the area between the top of the visor and the point where the cap begins to curve.
You can use the following formulas to calculate the height of the sewing field for different crown sizes:
Designs that embroider well on flats may not embroider as well on caps because of the uneven tension a cap frame provides. Here are some ideas to help improve embroidery quality on your Wide Angle Cap Frame:
-
To help eliminate registration problems (on 6 panel caps), digitize from the center out; start in the center of the design and embroider one side of the cap then return to the center and embroider the other.
-
Complete entire design elements as you go around the side; for example, if you have lettering with shading, embroider a letter, then its shading, then move on. This helps to eliminate the push-pull tendency of the fabric of the cap.
-
If you have a lot of running stitches in a design, consider converting them to satin stitches. Running stitches have a tendency to lose registration.
-
With large designs, try to alternate the direction of the stitches. This helps to eliminate the push-pull tendency of the fabric of the cap.
-
Use more underlay stitches to help stabilize the design and prevent distortion. Six panel caps need more underlay in the center where the seam is.
-
Using a fusible non-woven backing on six panel caps helps hold the two front panels firmly together.
Modifying your designs to embroider on cap may give you more trims and color changes, but it will also provide you with much better embroidery quality.
-
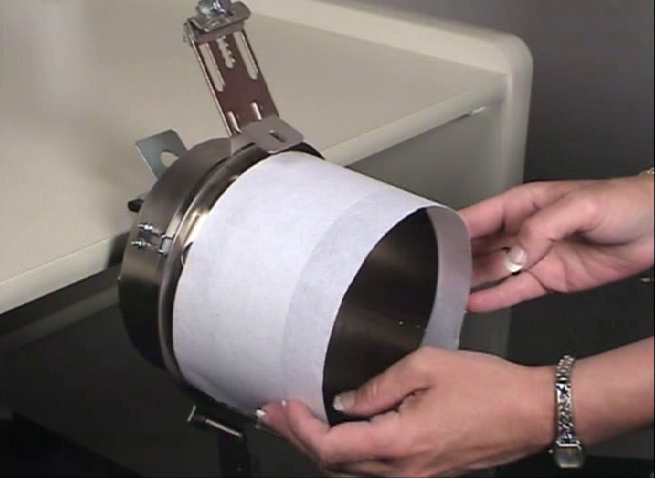
To hoop a cap on the XT Wide Angle Frame, first attach the rotating cap frame hooping gauge to a stable surface. To attach, slide the black clamp onto the surface and tighten the bottom clamp until the gauge is held securely. The two white roller clips should be facing up.
|

|
-
At any time during the cap hooping process, the hooping gauge may be rotated by depressing the lock actuator. The gauge can then be rotated to a better position for hooping. Release the lock actuator to lock the gauge in its new position.
|
-
Rotate the gauge so that the locating tab is facing up.
|
-
Now, slide the cap frame onto the gauge, making sure the locating tab on the cap gauge fits into the cap frames notch, and the cap frame slips firmly under the two roller clips.
|
-
Swing the metal strap open.
|
-
Appropriate backing can now be placed over the gauge. The backing stays outside the clip posts and inside the strap hinge and latching posts. If desired, you may use several layers of backing.
|
|
-
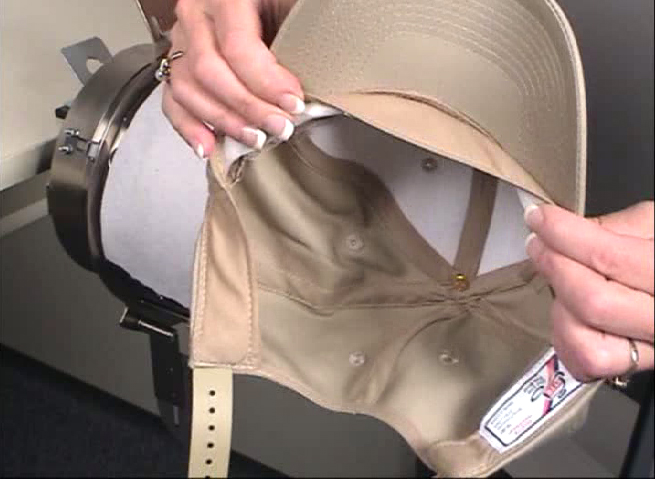
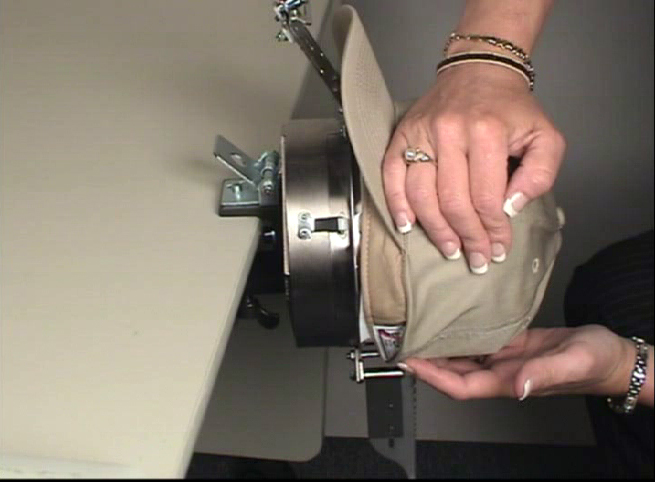
Prepare the cap for sewing. Open the back strap and spread the sweatband out completely.
|
|
-
If the cap has a braid, move it around the cap to the inside and under the brim.
|
-
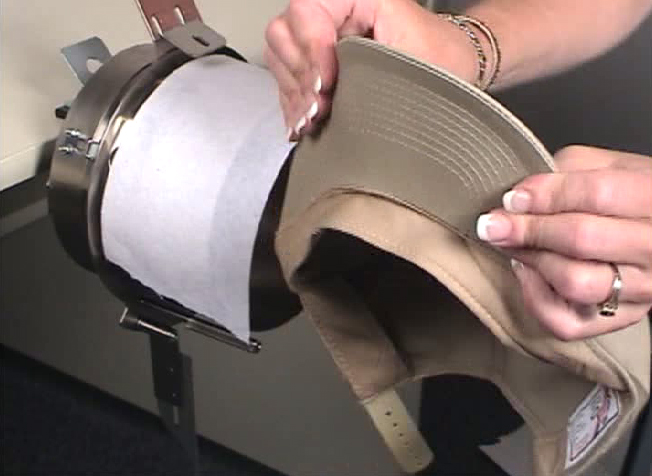
Straighten the bill to where it is flat. After the cap is sewn the bill can be reformed.
|
|
-
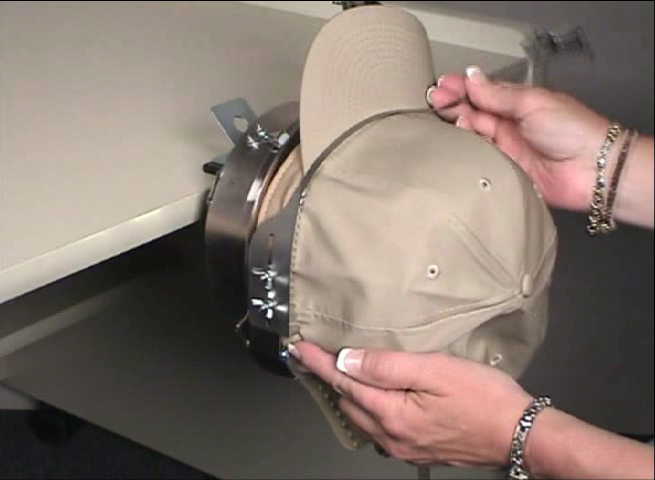
Now, slide the cap on to the cap frame. The brim should be pushed against the stop on the bill support arm, as well as centered under the bill support arm.
|
|
-
The cap should ride over the two clip posts.
|
|
-
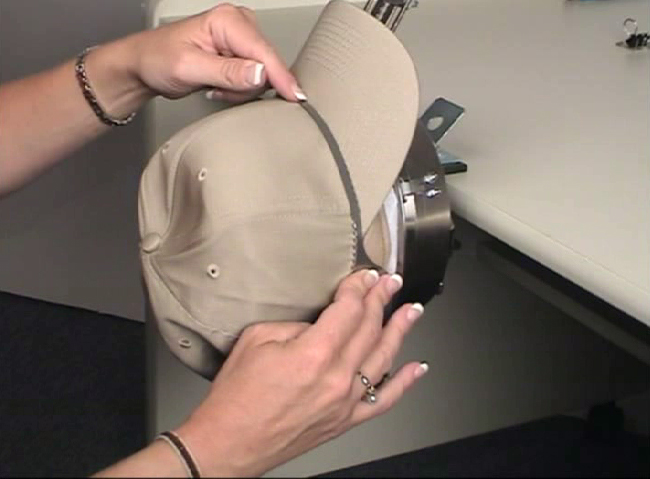
Pull the side of the sweatband toward the cap frame and down.
|
-
Insert the material within the strap hinge posts. Remember the hooping gauge can be rotated if desired.
|
-
Smooth any bunching of the cap sides or sweatband.
|
-
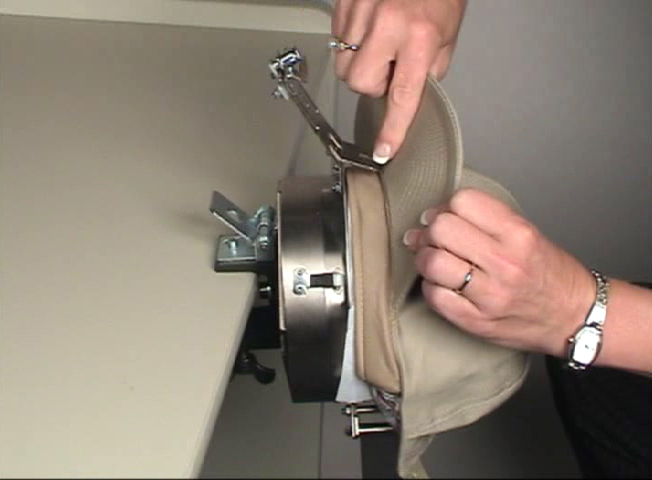
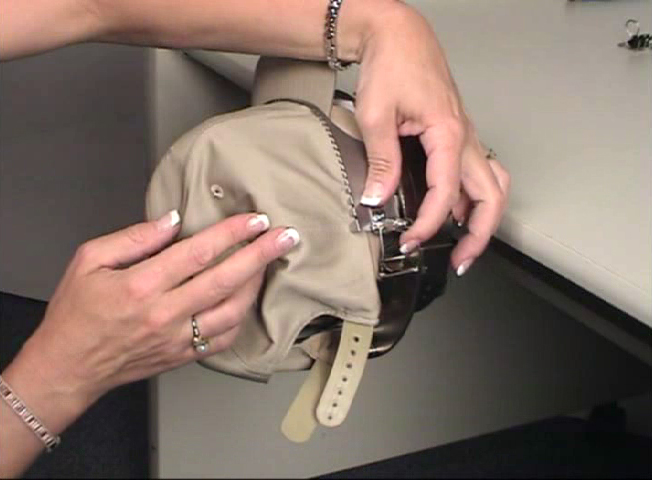
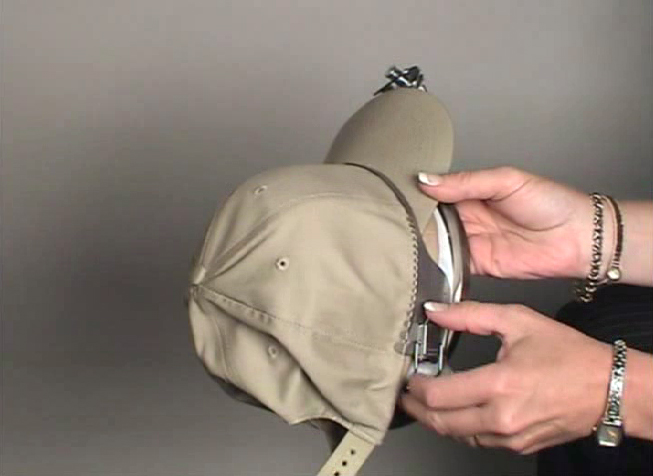
Once the caps left side is within the straps hinge post, swing the strap up and over the caps brim.
|
|
-
Close the strap, making sure the teeth of the upper portion bite into the brim seam. If the bill has moved from the center position, adjust the cap under the strap.
|
|
-
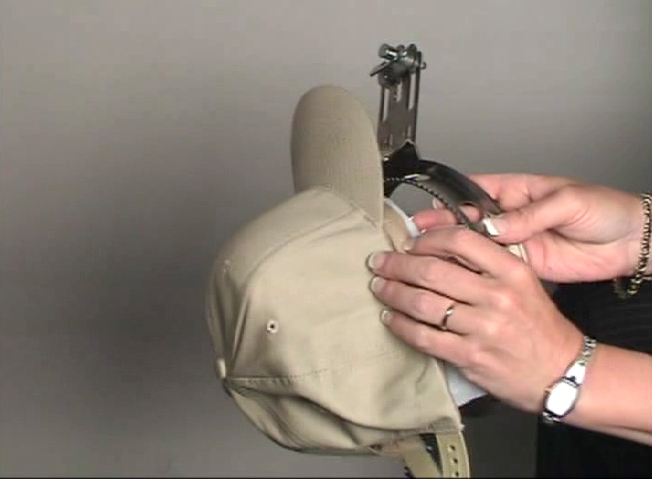
Slip the caps right side within the latch post.
|
-
Smooth any bunching of the caps sides or sweatband.
|
-
Hook the latch into the hook on the latch post and snap the latch closed.
|
|
-
If the cap frame strap is to loose or too tight, loosen the two wing nuts on the caps lefts side and slide the strap in or out as necessary before re-tightening the wing nuts.
|
|
-
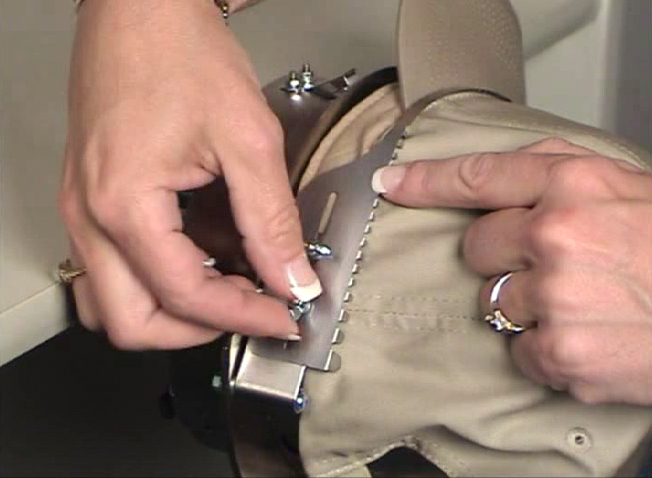
Smooth the cap material backward and over the clip posts on both sides. Indent the cap material and the backing along the front face of the clip posts.
|
|
-
While pressing the cap material, snap a clip over the clip posts. Orientate the clip handles towards the caps back.
|
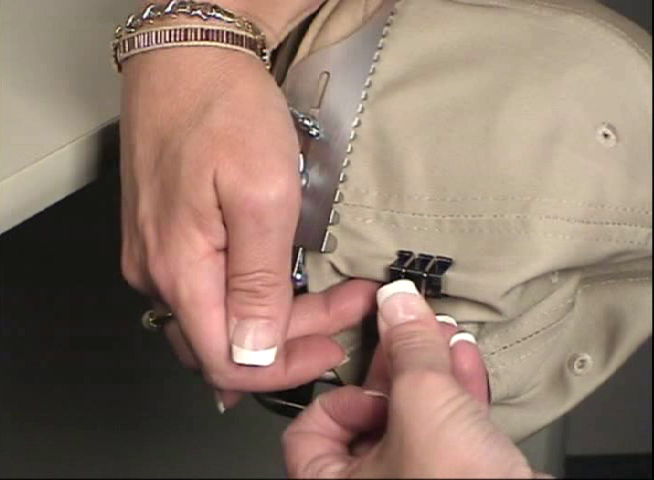
|
-
Attach a clip to the clip posts on the other side of the cap.
|
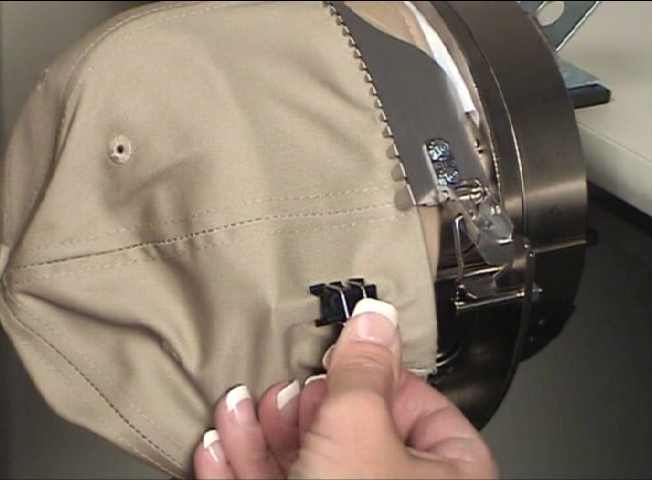
|
-
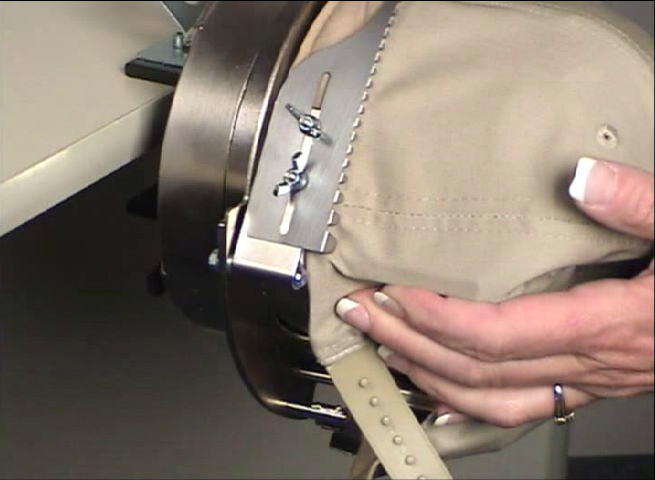
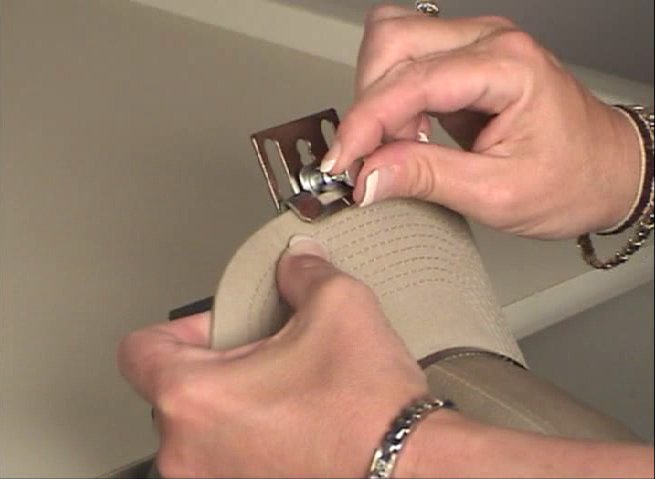
Pull out the knob on the bill clamp. Slide the clamp out along the bill support arm. Release the knob to hold the clamp on the end of the bill support arm.
|
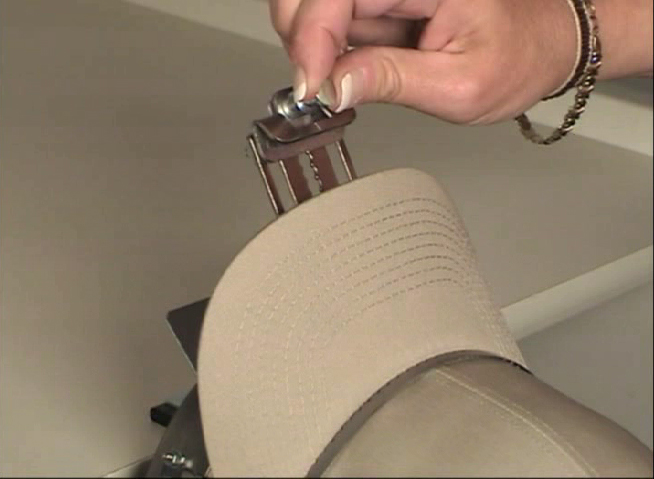
|
-
Wrap your hand around the bill support arm and press the bill to the arm using your thumb. Pull the clamp knob and slide the clamp down over the end of the bill. Release the knob to lock it into position. This will secure the bill to the support arm.
|

|
-
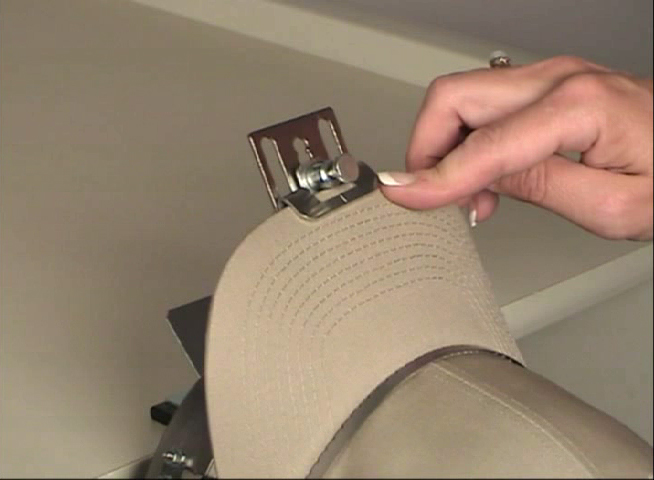
You may now remove the cap frame from the gauge.
|
-
Once sewing is complete, remove the clips and un-clamp the bill by pulling the knob and slide the clamp out along the bill support arm to the locked position.
|
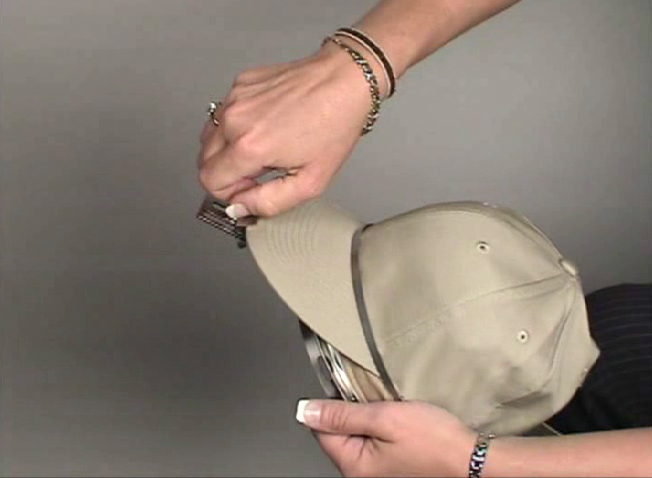
|
-
Unlock the strap latch and swing the strap around over the bill.
|
|
-
Slip the cap up off the frame.
|
|

