Adding Lettering Video
To insert lettering into a project, click the Lettering toolbar button (or select Insert->Lettering). When you left-click in the View Window, you will see a blinking cursor. You will also see a dialog appear in your toolbars (see image below).

You can use this dialog to change the Alphabet, Height, Line, and Connection before you type the lettering. If you make any changes in the dialog, left-click in the View Window again to type the lettering.
Type the lettering, then press ENTER. (If you want to type more than one line of lettering, press CTRL + ENTER to start a new line.) You will see a selection box around the lettering. (NOTE: If you want to open the Lettering Properties tab before you type the lettering, press the ENTER key before typing any lettering.) When the lettering is selected, you can click the Lettering toolbar button, then left-click in the lettering to remove or insert letters if desired. You can also left-click in the lettering, and use the shortcut keyboard commands to insert color changes, trims and/or customized spacing. Click here for more information on these commands.
To use more than one alphabet in a lettering object, type some lettering, then change the alphabet in the floating dialog. Press ENTER to return to the lettering, and type remaining letters.
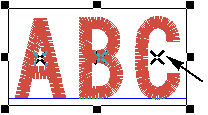
The selection box around the lettering object can be used to scale the lettering (handles can be clicked and dragged to resize the entire lettering object). Each letter also has its own handle (see image below).

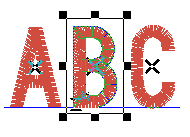
Left-click a letter’s handle to select the letter. When a letter is selected, a selection box will appear around it. You can left-click the letter handle, hold down the mouse button, and drag the handle to move a letter left or right. If you press and hold the CTRL key, you can left-click the letter handle and drag the letter up or down.

You can click and drag the handles of the selection box to scale the individual letter (when a letter is scaled, the spacing on each side of the letter will automatically be adjusted). To rotate a selected letter, right-click and select Rotate from the popup menu. You can also change the properties of the individual letter (right click and select Properties from the popup menu).
When an individual letter is selected, the entry and exit points of that letter will be displayed (the following image shows an example of entry and exit points). Click and drag these points to move them.

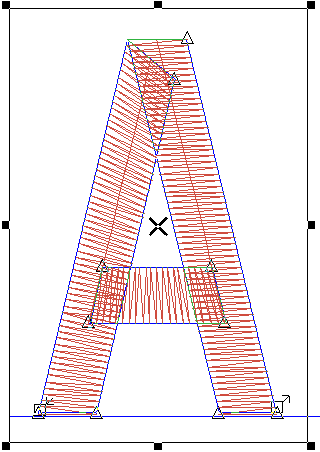
To edit the digitized points of a selected letter, click the Wireframe
Editing Mode button  when a letter is selected. The
digitized points will be displayed (see the following image), and you
can delete, insert, or move points if desired.

NOTE: You can access the properties of existing lettering just as you would with any other element: left-click the lettering to highlight it (in the View Window or Project View), then right-click and select Properties from the pop-up menu (or select View->Properties). You can also double-click the lettering element.
NOTE: If you want to edit walks in addition to columns, right-click on the letter and select Wireframe Editing Mode All.
Click here for more information on the Stitch Direction toolbar.