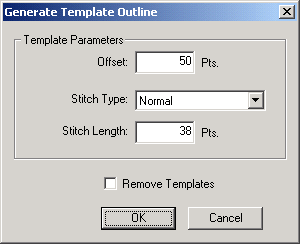
This feature allows you to generate stitch outlines around selected
embroidery; these outlines correspond to the shape of embroidery. When
combined with Step and Repeat, this feature can be used to create multiple
outlines of the same design. These outlines can be sewn, then used as
guides to cut out holes from a piece of backing, which can then be used
as a template when sewing.
These templates are particularly useful when sewing patches and panels.
Panels and patches can be attached to the backing (e.g., with double-sided
tape) where the templates have been cut out. The patches / panels can
then be sewn on and removed. This process can be repeated multiple times,
without having to re-hoop.
This section will explain how to generate these outlines and how to
use them to sew on patches / panels.
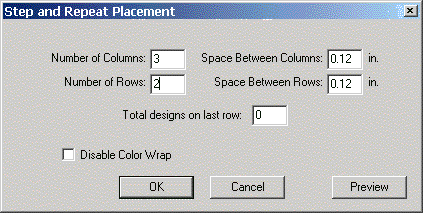
When finished with adjusting these settings, click
OK to apply the
changes and close the Step
and Repeat dialog. The design will be duplicated, and each
design will be outlined. (Please note that depending on how fast your
PC is, this may take some time).
You are now ready to save the template outlines.
There are two options for saving these outlines. You can select to
save the project file (.ofm).
Save the ofm file with a different file name so you do not save over the
original file. This will save both the template and the design in the
same file. Use this method if you will be sewing the template outlines
on an AMAYA machine.
You can also select File->Save
As to save as an expanded file (.exp). This will actually create
two expanded files: one containing the design only and the other containing
the template outlines only (-template
will be added at the end of the file name for this design). Use this method
if you will be sewing on a machine other than the AMAYA.
You can now sew the template outlines. If you
are sewing on the AMAYA machine, and you have AMAYA OS and DesignShop
installed on the same computer, you can send the ofm file directly from
DesignShop (you must have version 5.07.024 or higher of DesignShop and
AMAYA OS ). Select to load the template (without the design)
to the AMAYA machine. At this point the template can be sewn.
In AMAYA OS, you can toggle the display to either show the design
only or the template only (you cannot display both at the same time).
(Please note that depending on how fast your PC is, toggling the display
may take some time). To do this, click the Template
button  . Note that clicking this button loads the design
or template (this depends on what is being displayed) to the machine.
This button is only visible when templates have been generated from the
loaded design.
. Note that clicking this button loads the design
or template (this depends on what is being displayed) to the machine.
This button is only visible when templates have been generated from the
loaded design.
After the template is loaded, hoop a piece of
cutaway backing in the appropriate hoop (you may want to use a heavier
backing, such as 3 oz.).
Install the hoop.
Make sure the correct hoop is selected, and make
any desired settings changes.
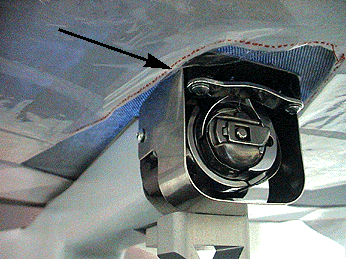
After you sew out the template, remove the hoop.
See the image below for an example of sewn out template outlines.

-
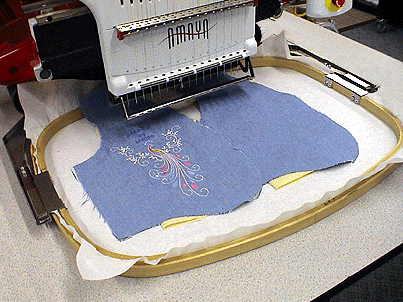
You can now cut out the templates. To do this, cut out the backing
as close as possible to the inner edge of the outlines (see the following
image).
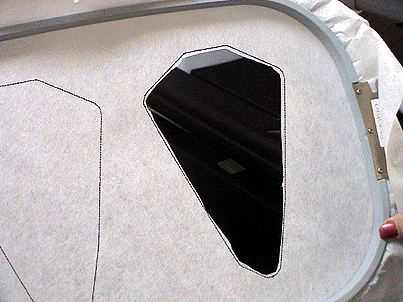
You now have a template.
|

|
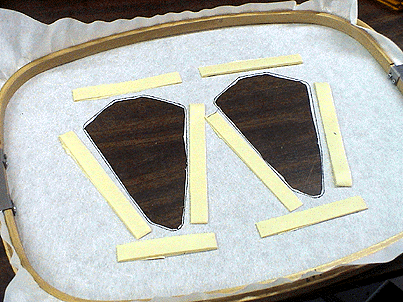
Tip : At this point you may
want to stabilize your template with packing tape. To do this, you can
stick packing tape on the edges of the template holes and wrap it around
the areas of the backing between the template holes.
|
Using the following image as an example, place
double-sided tape around each of the holes you have cut out in your template.
This tape will hold your panels / patches in place during sewing.
Before sewing, you may find it helpful to place
one of your patches / panels in the desired location on the template and
then draw some placement guides with a marker around the edges of the
patch / panel. See the following images for an example.
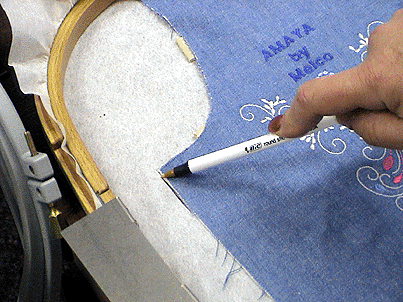
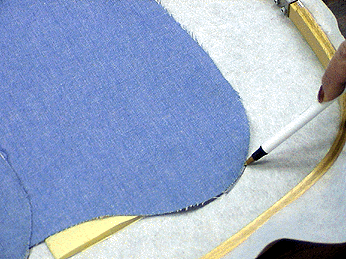
These guides can then be used when placing patches / panels on the
template during sewing.