![]()
The needle depth should be set after any of the following:
replacement of any of the needle bars or needlecase assembly four-packs
disassembly of the needlecase assembly
when diagnostic tests determine resetting of needle depth is necessary
To set the needle depth, the AMAYA OS must be started and the machine must be turned on. Refer to the following procedures to set the needle depth.
You can set the needle depth with or without using the pin and barrel fixture assembly (Melco PN: 32650). However, using this fixture will allow you to set needle depth more precisely. When this fixture is used, needle depth will be set to the AMAYA needle depth specification (1/4 - 1/2 needle eye visible).
Color change to Needle #1.
Remove the needle plate, the bobbin case, the rotary hook, and the rotary hook support.
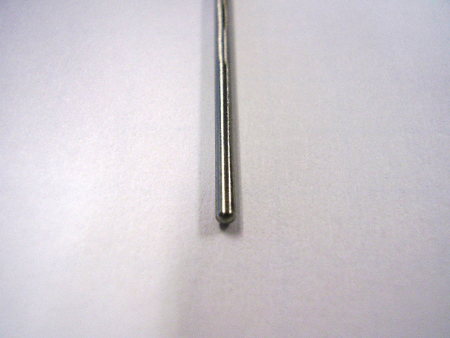
Remove Needle #1 and locate the pin included in the fixture kit (Melco PN: 32650). Note that the pin has one rounded end and one straight-edged end.
Insert the rounded end into the needle hole of the needle bar and push the pin up until you hit a dead stop.
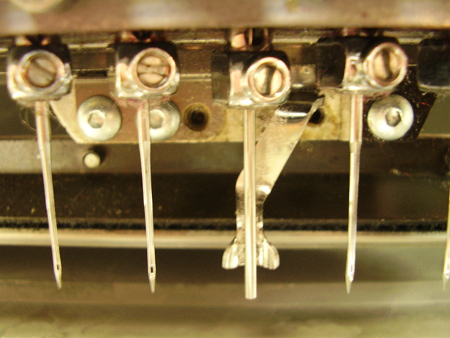
Tighten the needle clamp screw.
Click the Maintenance menu on the AMAYA OS main menu screen and then click the Head Timing tab to open up the Head Timing menu.
Click the Bottom Center button.
Loosen the needle bar drive stud.
Slide the barrel on the lower arm shaft. If required, move the needle bar up to clear the barrel.
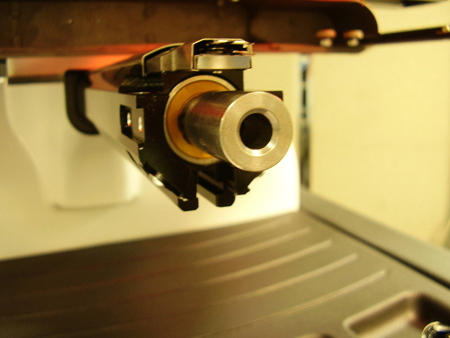
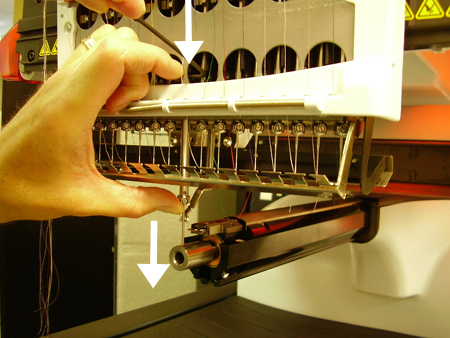
While simultaneously pushing lightly down on the needle clamp (to ensure contact with the barrel) and pushing down on the needle bar drive stud (to take up the normal clearances in the z-drive system), tighten the needle bar drive stud.
NOTE: The pin should drag lightly but not deflect when rotating or moving the barrel in and out.
Click the Head Up button.
Remove the barrel and the pin.
Re-install the needle.
Color change to the next needle and repeat steps 3-13 for needles 2-16.
Re-install the parts in Step #2 when the procedure has been completed for all needles.
NOTE: Refer to the Rotary Hook Replacement section during rotary hook installation.

Figure 1 - Head Timing Menu
Click the Maintenance menu on the AMAYA OS main menu screen, and then click the Head Timing tab to open up the Head Timing menu.
Remove the bobbin case and bobbin (if installed) and then click the Head Up button and then color change left to Needle 1.
Click on the Bottom Center button.

Figure 2 - Needle Depth
Look directly into the hook assembly and check the location of the needle’s eye compared to the figure above. 1/4 - 1/2 of the through portion (the portion that you can see through) of the needle eye should be visible in the hook assembly. If the needle’s eye is in the acceptable range, skip the next few steps and go to Step 7. If the needle’s eye is not in the acceptable range, continue this procedure with the next step.
Loosen the set screw on the needle bar drive stud and move the needle bar up or down until needle depth is correct. (1/4 - 1/2 of the needle eye through portion should be visible) Repeat step 4 above and repeat this step again if the needle depth is not correct.
Click the Head Up button and then the Bottom Center button and check that the needle is at the proper needle depth position. If it is not, go to step 5 above.
Click on Head Up. Color change to the next color.
Repeat steps 3 through 7 until needle depth is set on all 16 needles.
Reinstall the bobbin and bobbin case.
Run the following AMAYA test designs on the machine:
![]()