The proper bobbin tension and installation also play an integral role in the quality and efficiency of an embroidery sewout
Removing the Bobbin Case
CAUTION: Never attempt to remove or insert the bobbin while the machine is in operation.

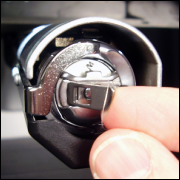
- The bobbin case can be removed from the lower arm of the AMAYA by locating the release lever on the bobbin case.
- Pull forward on this lever until the case is free from the machine.
- Remove the old bobbin from the case.
Cleaning the Bobbin Case

- It is recommended that you clean under the tension spring of your AMAYA bobbin case every time you change the bobbin.
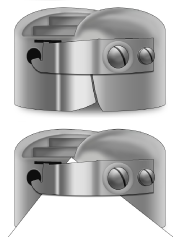
- Lint and bobbin wax can build up under the spring, and this can affect bobbin tension. To clean under the spring, slide a corner of a small piece of paper under the tension spring in the same direction the thread travels. While cleaning under the tension spring, be careful not to bend the spring.
- After cleaning the bobbin case, blow the case out with compressed air. It is also recommended that you check the bobbin tension.
Inserting a New Bobbin in the Bobbin Case
& Checking the Tension

- Hold the bobbin case with the front facing down and the open end facing up.
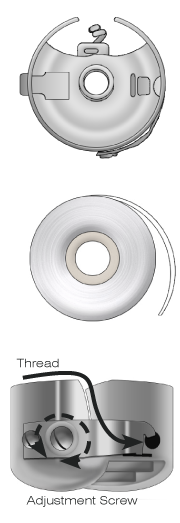
- Hold the new bobbin with the thread coming over the top and to the right in a clockwise fashion. It should look like a number nine (9).
- Without flipping the bobbin, drop it into the bobbin case.
- Route the thread through the thin slot opening and under the tension spring. The bobbin thread should no be releasing from the side of the case.
- To check the tension of the bobbin, hold the bobbin thread with one hand. As you gently bounce the thread, the bobbin case should drop approximately 1 - 2 inches / 25 - 50 mm. If the tension is incorrect, use a flat-blade screwdriver to turn the larger adjustment screw clockwise to tighten or counterclockwise to loosen the tension.
This test must be completed BEFORE winding the thread through the pigtail. - Once the tension is set, wind the thread through the pigtail.
Inserting the Bobbin Case
CAUTION: Never attempt to remove or insert the bobbin while the machine is in operation.

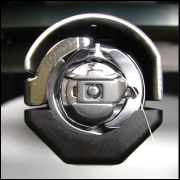
- Insert the bobbin and case in the machine with the pigtail facing up. Push on the bobbin case until it snaps into place.
- Test the bobbin orientation by pulling on the thread. The bobbin should rotate counter-clockwise.
- Trim the thread to 2 - 3 inches.
NOTE: If the thread is cut too short, it will not pick up on the stitch. If the thread is left too long, it may wrap into the machine.