This section will describe how to correctly connect the power and communications cables to the AMAYA and the computer.
An Ethernet network connection is required to for communication between the computer and the AMAYA. This connection must be established in order to control and send designs to the machine.
The method for connecting the machine to the computer will vary depending on the number of machines.
In this section, you will find information on:
- Connecting the Power Cables
- Connecting the Network Cable (Single Machine)
- Connecting the Network Cables (Multiple Machines)
- Don't Share Networks
Materials Required
To connect a single machine, you will need the following items:
- 1 Power cable
- 1 crossover cable OR 1 Ethernet switch and 2 Ethernet cables
To connect multiple machines, you will need the following items:
- 1 Power cable
- 1 Ethernet switch
- 1 Ethernet cable for each machine
- 1 Ethernet cable for the computer
Connecting the Power Cables
- Locate the power cable you will be using with your machine.
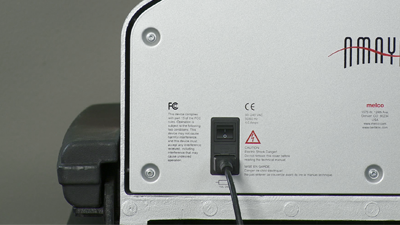
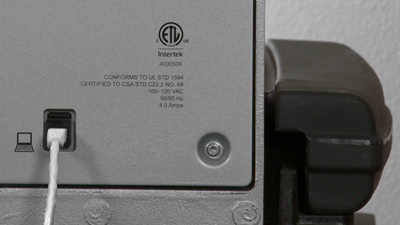
- Locate the power cable plug in the rear of the machine.
- Make sure the machine power switch is in the OFF position. Plug the power cable into the inlet.
- If you are using a line conditioner, as recommended by Melco, plug the other end of the cable into the dedicated line conditioner.
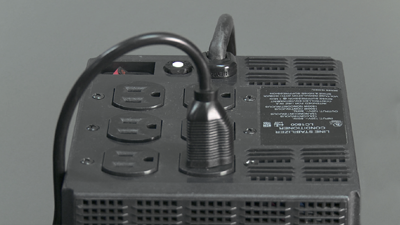
- Connect the line conditioner into a power source.
Connecting the Network Cable (Single Machine)
For a single machine to computer connection, a crossover cable is required. (You can also use 2 Ethernet cables and an Ethernet switch).
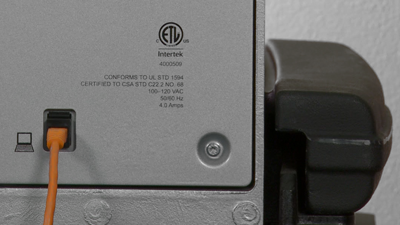
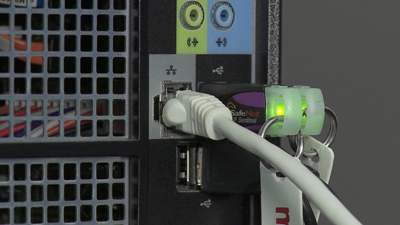
- Connect one end of the crossover cable into the Ethernet jack on the machine.
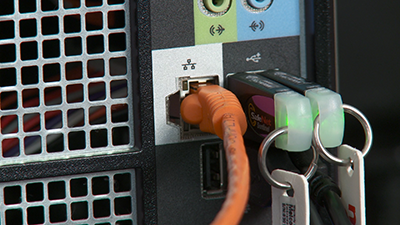
- Connect the other end of the crossover cable into the Ethernet jack on the computer. The location of this network connection will vary from computer to computer. If using multiple network cards, it may be helpful to label them on the back of the computer.
- If connecting only a single machine, you may now move on to Powering Up the Machine.
Connecting the Network Cables (Multiple Machines)
For connecting multiple machines to the computer, an Ethernet switch device and cables are required. The switch is a small electronic device that allows multiple devices (in this case AMAYAs) to be connected through a network. You can connect as many machines as your switch will allow.
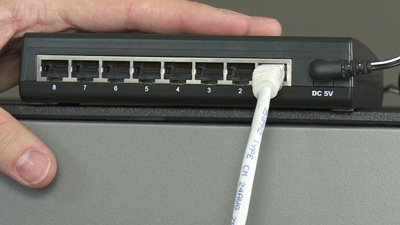
- Connect the Ethernet switch power cable to the switch and a power source.
- At least two Ethernet cables are required with the switch. Connect one end of the Ethernet cable into any port on the switch.
- Connect the other end of this cable directly into the Ethernet port on the computer.
- Now using another cable, connect one end into a different port on the switch.

- Connect the other end into the cable port on the first machine you want to connect.
- If there are other machines, continue to connect the next cable(s) from the Ethernet switch to the machine(s).
- If all the machines are connected, you may now move on to Powering Up the Machine.