At this point, it is assumed that you have completed all of the prior steps for getting started. If you have missed any steps, please return to those steps at this time and after completing Steps 1 - 8, return here to sew your first design. These instructions will link you to the necessary information for each step. Simply click on Learn how... to reach the instructions for the relevant section.

Learn how... to load a design from Load Design.
Learn how... to use the Load Design Wizard.
Learn how... to set your color sequence.
Select the hoop that fits as closely as possible to the design without going over the hoop limitations (dotted line). AOS Lite displays unavailable hoops in grey.
Learn how... To select a hoop.
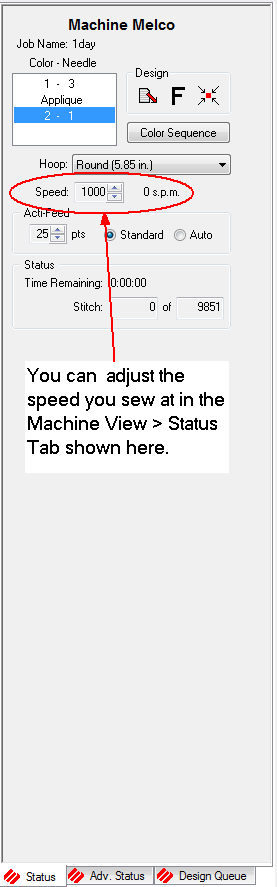
For your first sewout, set this to 1200 spm. This is a very common speed for designs sewn in flat (not cap) hoops. AOS Lite users can set the speed to 1000.
Speed can be set from a variety of locations, in this case you will set sewing speed using Machine View > Status. The image below shows where to adjust up or down the speed the AMAYA will sew at.
Auto Acti-Feed mode should work well for your first sewout.
Learn how... To adjust Acti-Feed Settings.
If you haven't already, you will need to select two pieces of cut away backing or a single pice of broad cloth and a single piece of cut away backing. Hoop them in the same size hoop you selected. It is extremely important that the hoop size selected in the software and the actual hoop size are the same. If they are different, damage to your machine could occur.
Learn how... To hoop.
The hoop arms may need to be attached or moved to the appropriate position to hold the hoop.
Learn how... To select the correct hoop in AOS
This is not necessary for your first sewout, but it may need to be addressed when sewing on caps, towels, or blankets. Keep this step in mind for your later sewouts.
Design Orientation can be changed using the design orientation tool on the Status and Advanced Status Tabs.
Learn how... To adjust orientation of your sewout.
This will center the hoop on the machine. If the design file was centered when it was created, this will also move the design to the center of the hoop.
Not all designs will be sewn in the center of the hoop. Some design, like those that are meant to be above a pocket, may be moved in the hoop to sew in a specific area.
Learn how... To center a hoop.
Tracing the design will check if the design will fit in your selected hoop. It will trace around the outer-most edges of the design. This will also give a fairly good indication of the placement of the design on the material.
Learn how... To trace a design.
This step must be done with the material hooped and loaded onto the machine. Not adjusting the Presser Foot can cause thread breaks and other sewing problems.
Learn how... To set and adjust the Presser Foot height.
Before you sew, just visually inspect the thread path and pinch rollers. Make sure that the threads are lined up with the v-notch in the small black thread feed roller covers, and are being held between the pinch rollers and thread feed rollers. Do not sew with a pinch roller in the up position. If you have not performed the initial maintenance in Step 8. please perform that now and return to this step.
When you have completed all the steps above, press the start button on the AMAYA Keypad.